Vim vs. Kakoune puzzles #
I have come across Esoteric Vim lately, an article that shows how to perform various advanced text manipulation in Vim. It dates from February 2025, so it’s a recent article about modern Vim. This article shows exactly why I think Vim is outdated, and why I think Kakoune — and by extension, since it’s based on it, Helix as well — has a much better text edition design. The goal of this article is to take all the puzzles form that exercise, and demonstrate how I would solve them in a real-world, practical way with Kakoune.
Most of the things I’m going to show here in Kakoune are also doable in Helix, but Helix is not as mature as Kakoune, so it’s likely some features won’t be available at the time of writing this blog article, May 2025.
Disclaimer: as always with programming tools, use the tool you are comfortable with. This article only reflects the way I see editing; it doesn’t mean one tool is superior to another in an absolute way. It’s just a way for me to share why I think Kakoune (Helix) is better, and provide some hindsight on both editors.
Thank you: thank you
@Screwtapefor reviewing this article!
- 1. Assigning numbers to existing enum classes
- 2. Fixing verbose SQL insert scripts
- 3. Extract field names from templates
- 4. Batch process multiple files
- 5. Integrate data from external sources into your project
- Kakoune has an incredible design
1. Assigning numbers to existing enum classes#
The example is this:
public enum TranslationCodeId
{
   // buttons
   BUTTON_Accept,
   BUTTON_Cancel,

   // labels
   LABEL_Actions,
   LABEL_Column,

   // messages
   MESSAGE_Confirm,
   MESSAGE_GoBack,

   // more fields...
}
Vim does it with two different actions:
- Assign
0to all enum fields::g/,$/v;//;norm $i = 0. - Increment all numeric values sequentially:
vi}o2/0,$<Enter>g<C-a>.
How to do that with Kakoune? The first thing is to be able to
get a selection on each enum field. We can use a similar trick as
what Vim does by targetting the line ending with a ,
with s,$. Because we assume — like in Vim — that this
enum definition is the whole buffer, we can work on the whole
buffer with the % key (similar to the g/
of Vim). So we simply just type %s,$<ret>.
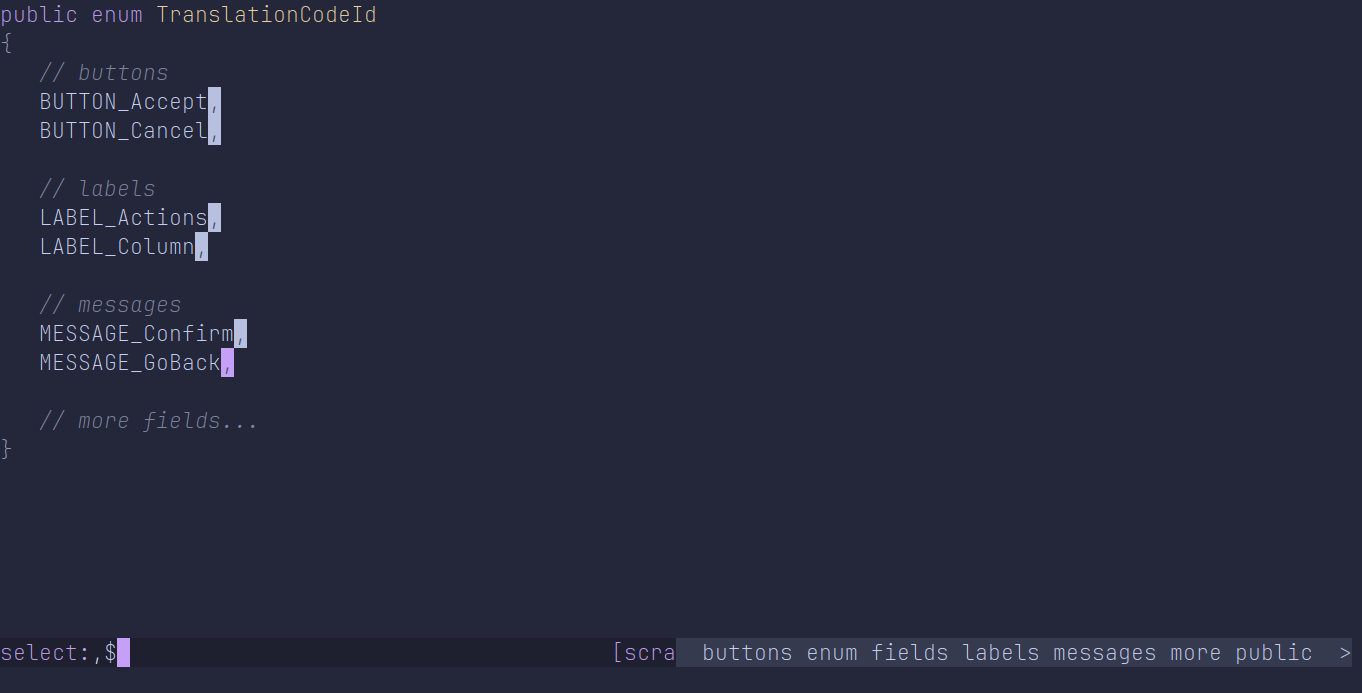
From now, the rest is really trivial, as we have a selection on
each ,. We can then simply type
i = <c-r>#, which will enter = N
before every column, where N will have the right
value.
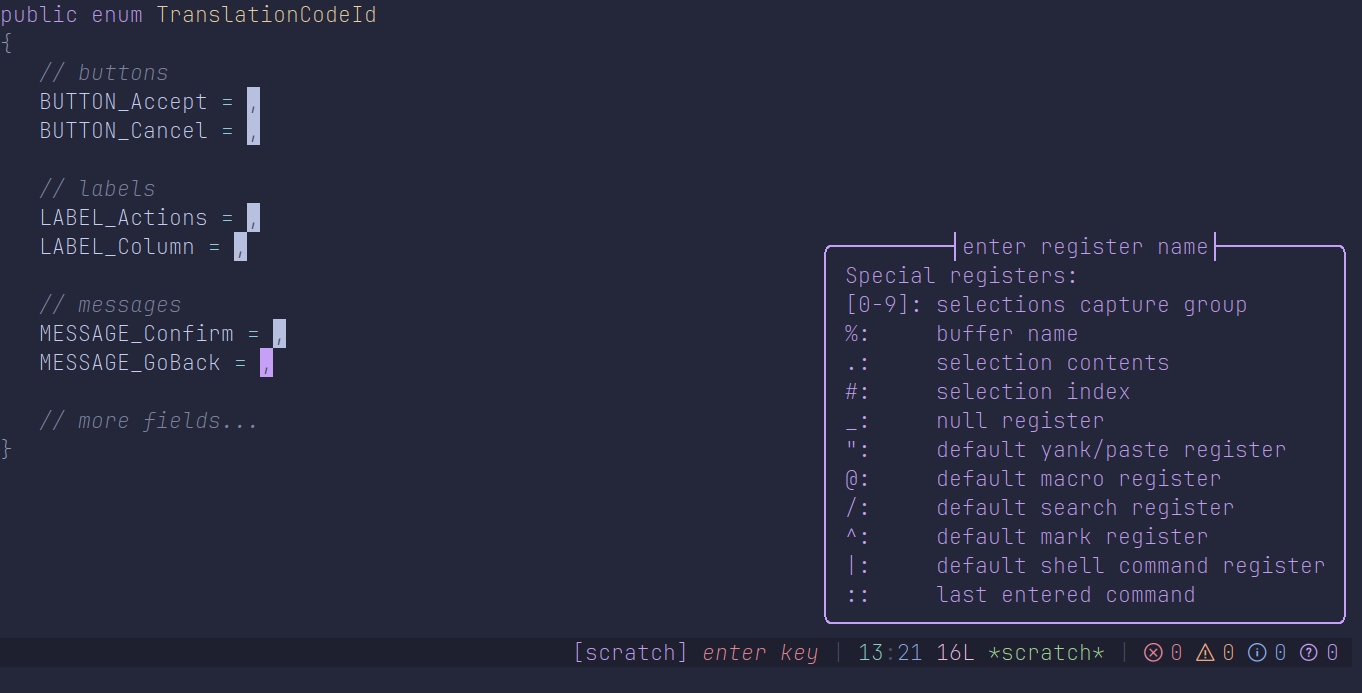
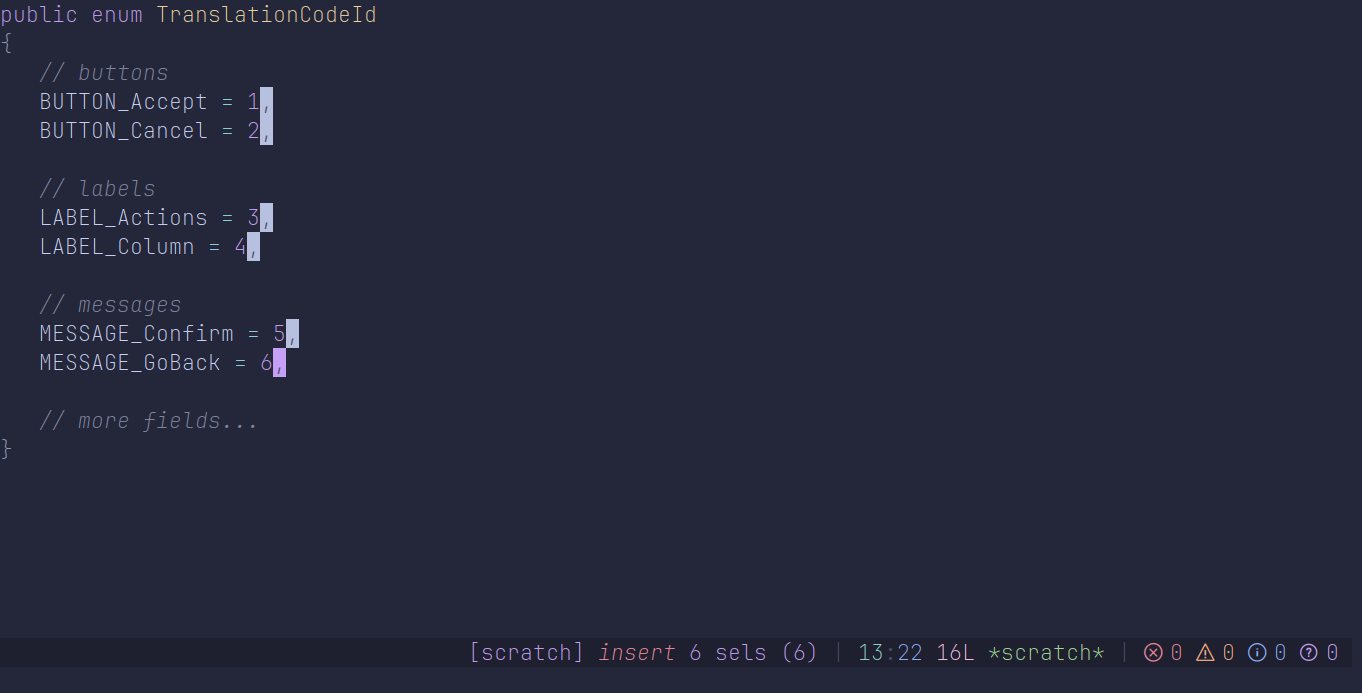
Some explanations: pressing control-r will allow the next key to select a register that will be pasted after all selections. Kakoune has many built-in registers, and
#is the selection index register; it gives you the index of each individual selection, starting from1, ascending.
2. Fixing verbose SQL insert scripts#
This one wants us to fix the ending characters of some lines:
INSERT INTO AdminTranslationCodeText
    (AdminTranslationCodeTextId, AdminTranslationCodeId, LanguageId, Text)
    VALUES
    (NEWID(), 'BUTTON_Accept', 'it', 'Accetta'),
    (NEWID(), 'BUTTON_Accept', 'en', 'Accept'),

    (NEWID(), 'BUTTON_Cancel', 'it', 'Annulla'),
    (NEWID(), 'BUTTON_Cancel', 'en', 'Cancel'),

    (NEWID(), 'LABEL_Actions', 'it', 'Azioni'),
    (NEWID(), 'LABEL_Actions', 'en', 'Actions'),

    (NEWID(), 'LABEL_Column', 'it', 'Colonna');
    (NEWID(), 'LABEL_Column', 'en', 'Column'),

    (NEWID(), 'MESSAGE_Confirm', 'it', 'Conferma'),
    (NEWID(), 'MESSAGE_Confirm', 'en', 'Confirm');

    (NEWID(), 'MESSAGE_GoBack', 'it', 'Torna indietro'),
    (NEWID(), 'MESSAGE_GoBack', 'en', 'Go back'),
GO
The Vim command:
:/VALUES$/+,/^GO$/-2s/;$/,/ | /^GO$/-s/,$/;/. No need
to comment on it; it’s barely impossible to tell what it does in a
quick glance; we have to decode it, and none of it will be
executed before you actually run the whole thing. It does a lot of
things, and you can see a bunch of text that has to be typed
there, like VALUES GO, negative relative
lines, etc.
The Kakoune version here is different, and, as expected, more
interactive. The first thing we want to do, as always, is to get a
cursor on the lines starting with a NEWID, and put
each cursor at the end of each line. We still use %
to select the whole buffer, sNEW<ret> to select
all NEW, and gl to move all selections
on the last character, which will be a , or a
;, depending on the line:
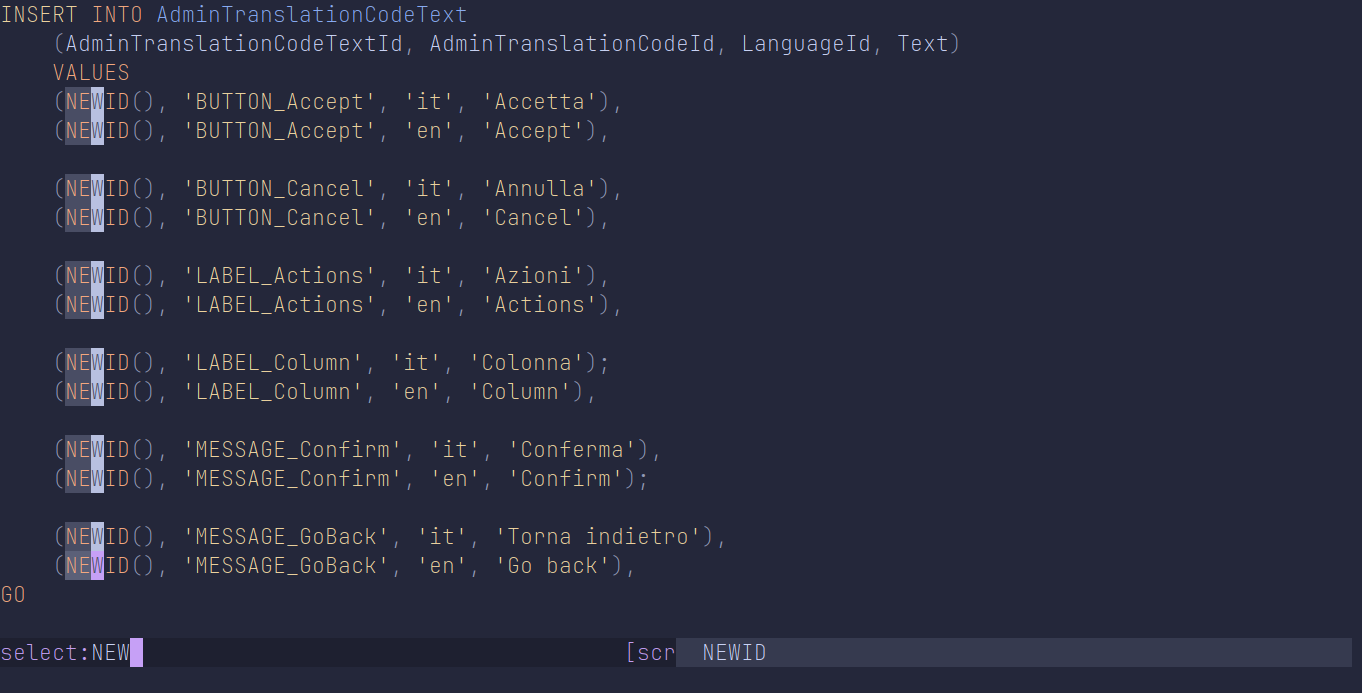
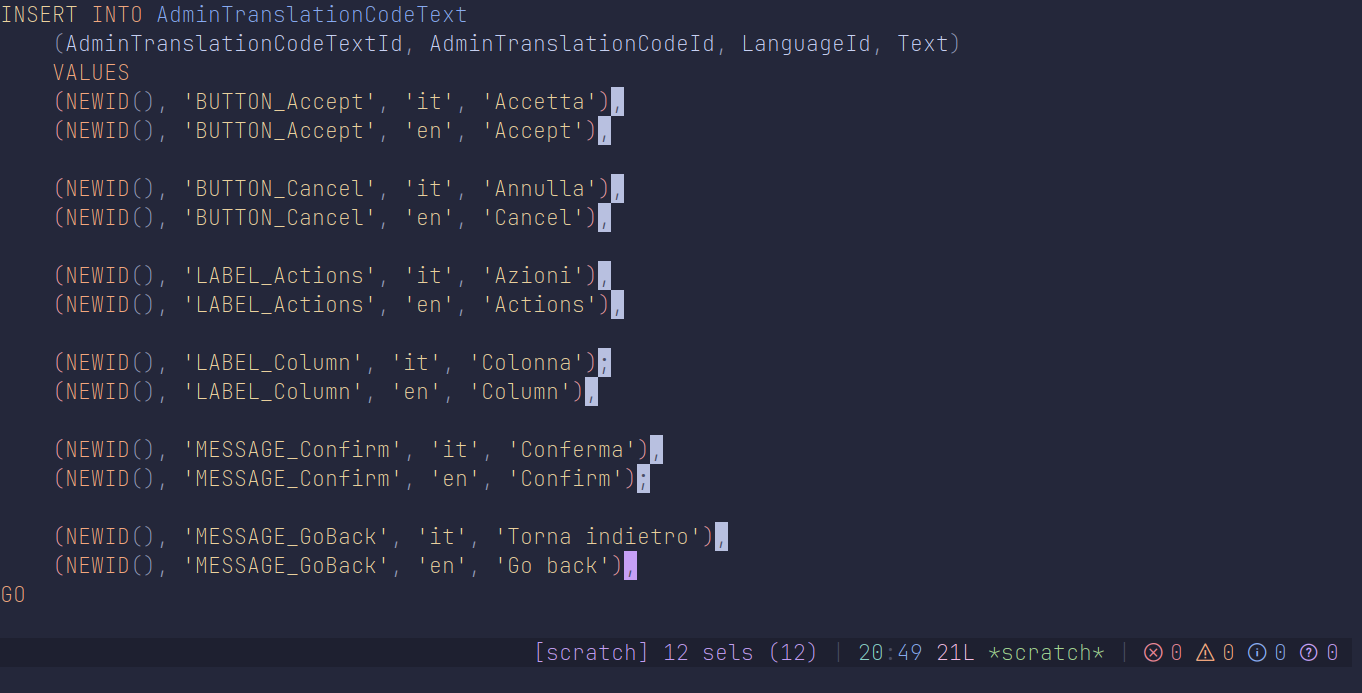
Then, simply type r, to replace all ending symbols
with ,:
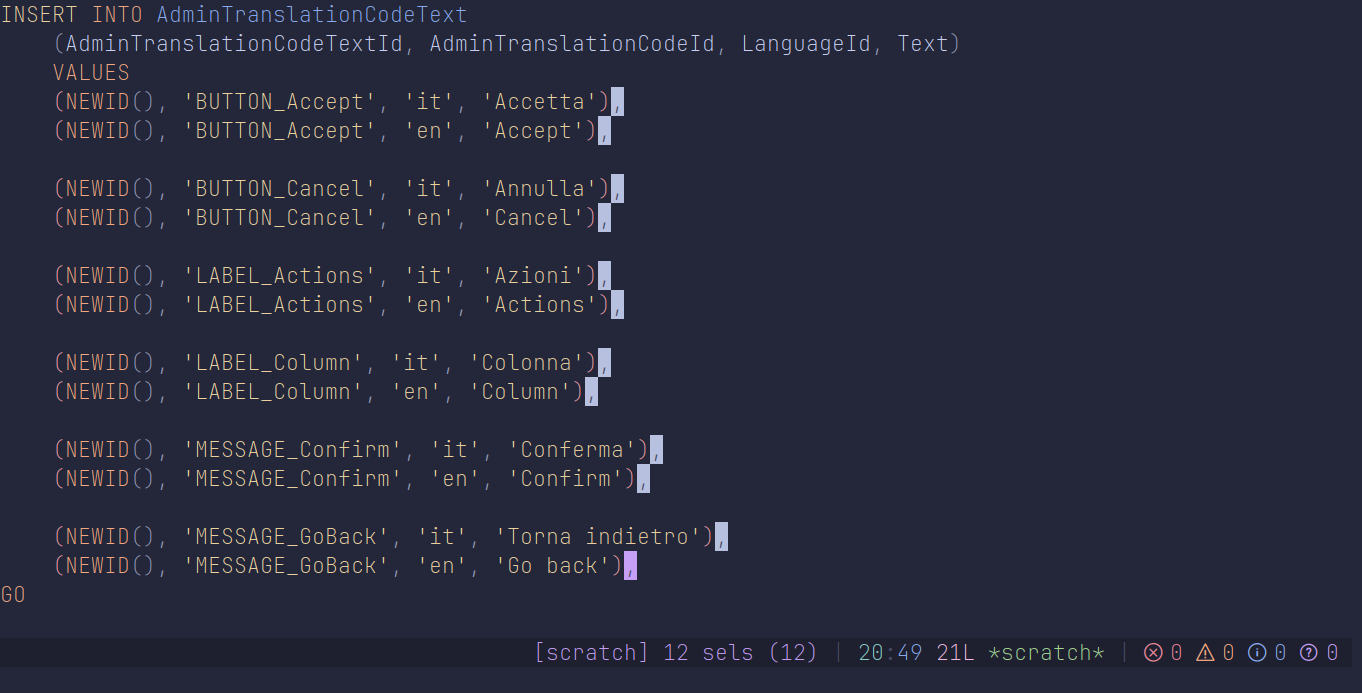
We now need to clean up the last line, since it requires a
;. We have a couple solutions, that I will
explain.
Drop all selections but the primary#
I like this one a lot because it’s very interactive and intuitive. Kakoune has the concept of a primary selection and secondary selections. The primary selection is treated specifically from others, as it’s used to perform some specific actions. For instance, imagine you select a function and all of its occurrences. Depending on where your primary selection is, the context action you might get from e.g. LSP will be different.
Kakoune allows you to cycle the primary selection with
secondary ones with ( and ). Usually,
highlighting will tell which selection is the primary — in my
screenshot above, the primary is pink-like; the secondary ones are
white-like. If you have typed the keys as mentioned below, you
should notice that the primary selection is actually on the last
line, which is already perfect! If it’s not, you can use
( and/or ) to adjust it; we want the
last line to have the primary selection.
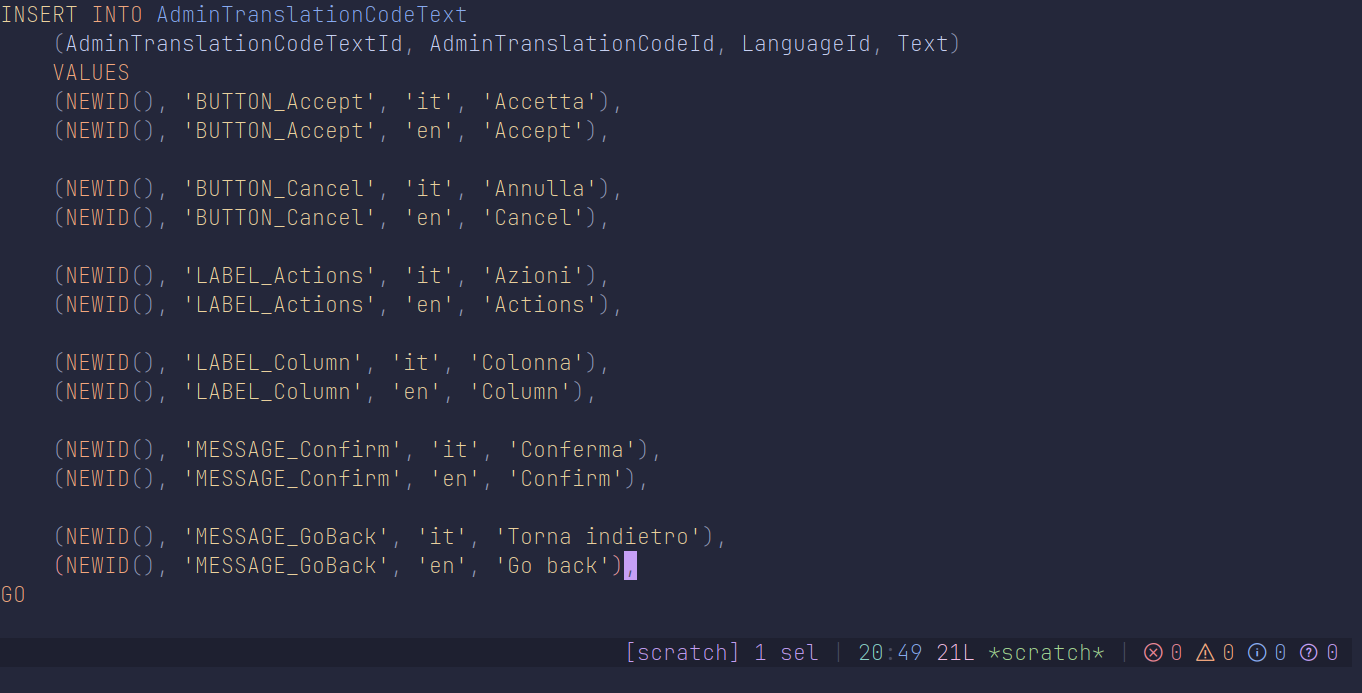
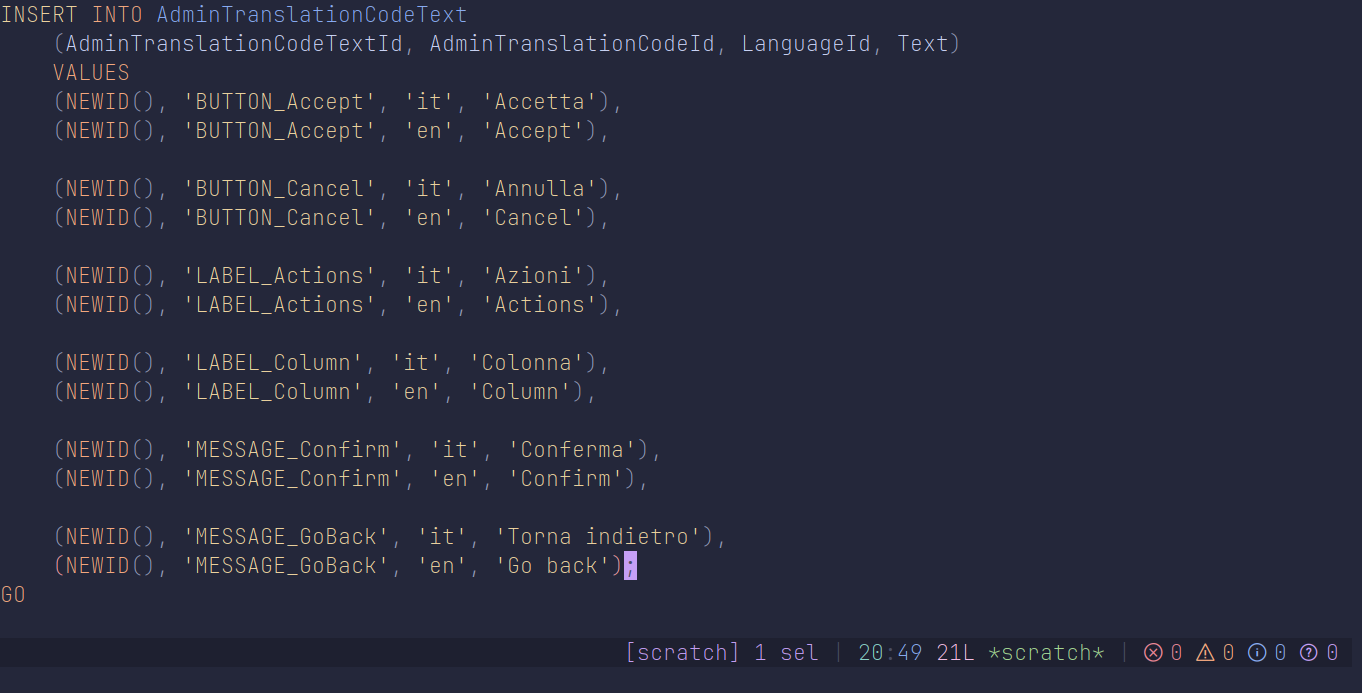
Then, just press ,. That key will drop all
selections but the primary one, leaving a single selection on the
last ,. You then know what to do: r;.
And we’re done!
Filter selections#
Another thing that I use from time to time is to filter (keep)
or discard (keep non-matching) selections. This is useful to
filter selections based off the already selected, disjoint
selections. We use the <a-k> key chord for
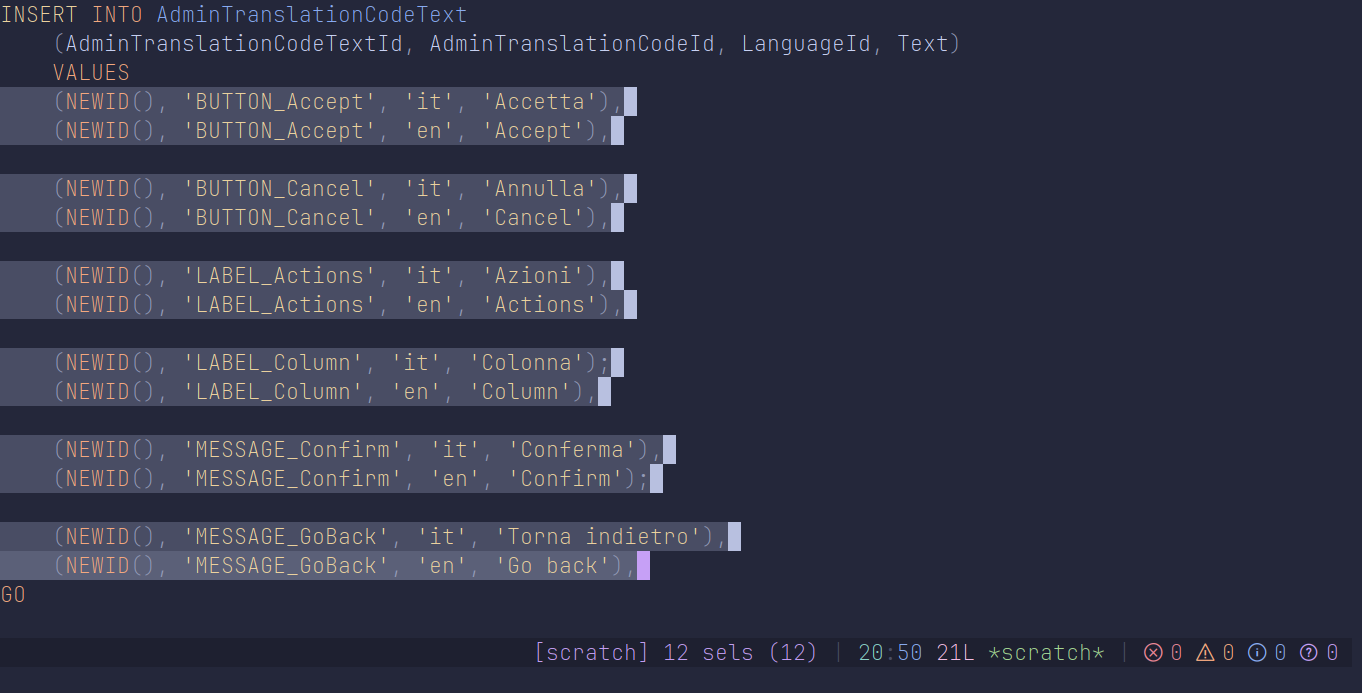
that. In our case, we can see that the last line has the word
back in it, which is unique to our selections. We can
select whole lines with x:
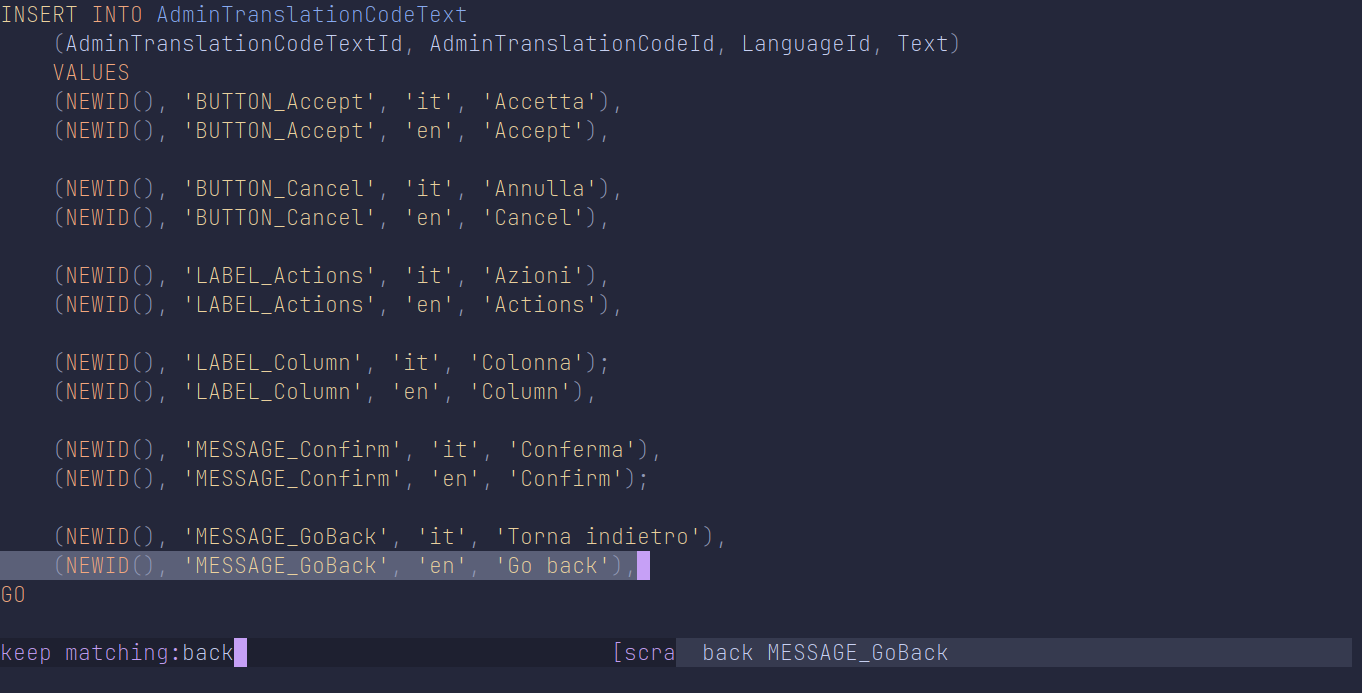
And then <a-k>back<ret> to select that
line:
Note:
<a-k>(keep matching) is different froms(select) in the sense that it will filter selections, whileswill select whatever you type, discarding already existing selections. Try them out to experiment!
Then simply do the previous thing: glr;.
Just do it manually#
Something that I think is important to notice is that, in most cases, you will most likely just move your cursor there and modify the character manually. Sometimes, it’s much faster to drop all selections and manually edit a bunch of characters instead of trying to be smart and spending mental effort for no real benefit.
For this reason, I think the first option is clearly the
way-to-go solution: just press ,, and the cursor will
already be at the right place. Kakouine encourages visual
exploration and interactivity; stop thinking too much about how to
edit stuff in advance, and do it gradually, incrementally!
3. Extract field names from templates#
This one is absolutely crazy in Vim. Based on this text:
{{#if UserDetails.FirstName}}Nome: {{UserDetails.FirstName}}{{/if}}
{{#if UserDetails.LastName}}Cognome: {{UserDetails.LastName}}{{/if}}
{{#if CallbackDetails.CallbackTimeStamp}}Data e orario indicati dal cliente per la chiamata: {{dateFormat CallbackDetails.CallbackTimeStamp format="d"}}.{{dateFormat CallbackDetails.CallbackTimeStamp format="M"}}.{{dateFormat CallbackDetails.CallbackTimeStamp format="Y"}} {{dateFormat CallbackDetails.CallbackTimeStamp format="H"}}:{{dateFormat CallbackDetails.CallbackTimeStamp format="m"}}{{/if}}
{{#if UserMotivation.ReasonSell}}Motivo della vendita: {{UserMotivation.ReasonSell}}{{/if}}

Informazioni sull'immobile:

{{#if PropertyDetails.ObjectType}}Categoria: {{PropertyDetails.ObjectType}}{{/if}}
{{#if PropertyDetails.ObjectSubType}}Tipo di oggetto: {{PropertyDetails.ObjectSubType}}{{/if}}
{{#if PropertyDetails.Street}}Via: {{PropertyDetails.Street}} {{#if PropertyDetails.Number}}{{PropertyDetails.Number}}{{/if}}{{/if}}
{{#if PropertyDetails.Zipcode}}Luogo: {{PropertyDetails.Zipcode}}{{/if}} {{#if PropertyDetails.City}}{{PropertyDetails.City}}{{/if}}

Valutazione immobiliare:

{{#if ValuationDetails.EstimatedMarketValue}}Prezzo di mercato stimato: {{ValuationDetails.EstimatedMarketValue}}{{/if}}
{{#if ValuationDetails.MinimumPrice}}Prezzo minimo:  {{ValuationDetails.MinimumPrice}}{{/if}}
{{#if ValuationDetails.MaximumPrice}}Prezzo massimo:  {{ValuationDetails.MaximumPrice}}{{/if}}
We want to extract all field names from that Handlebars template snippet. To do that in Vim, you need to store the names in a register, remove duplicate lines, and format the result. Let’s see how to do that in Kakoune.
We start as always by selecting the whole buffer and follow a
similar idea as in Vim by selecting the if, but we
will use the # as well — I think it’s more correct
than using the trailing whitespace:
%s#if<ret>:
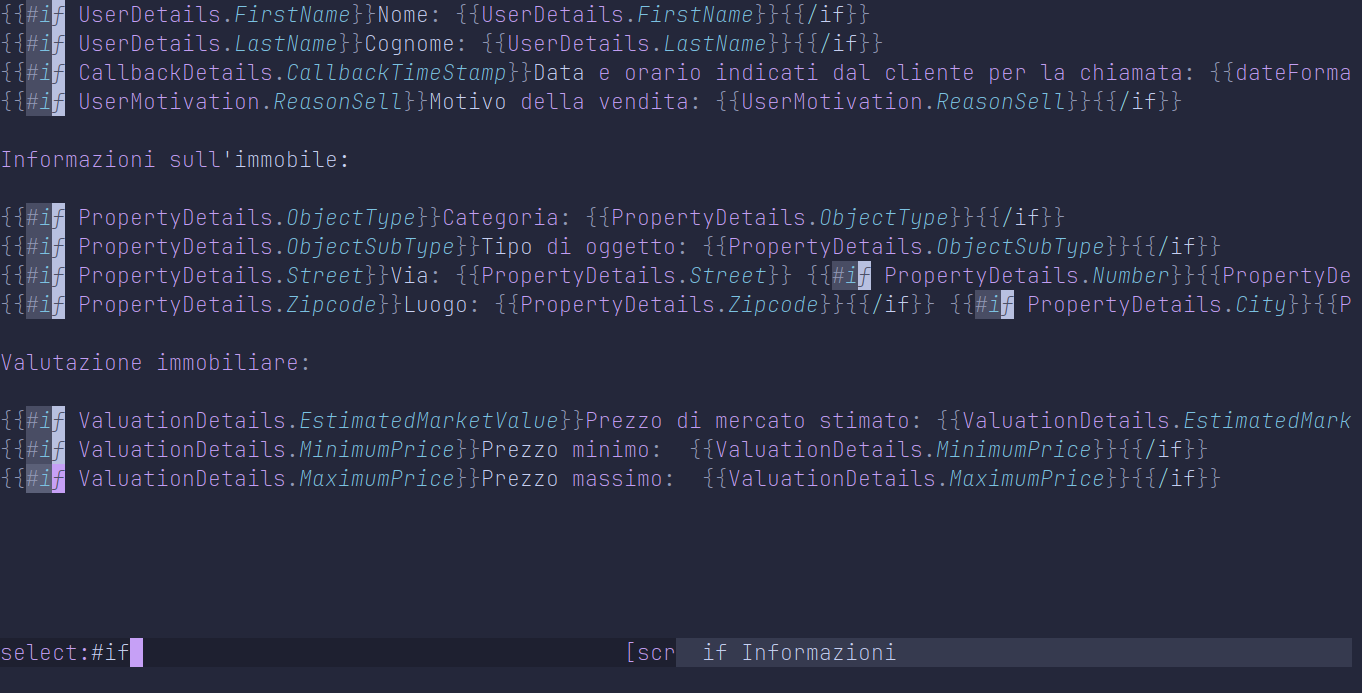
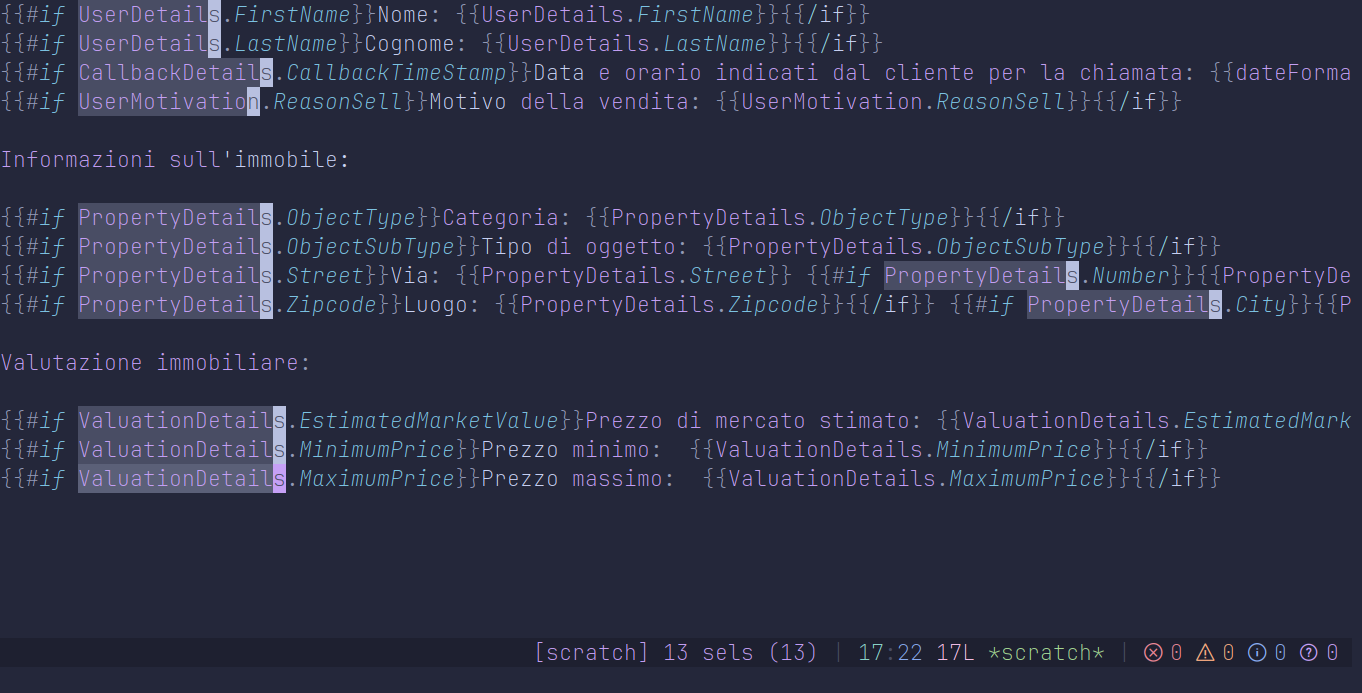
That gives us a selection on each #if. We can then
press w twice to fully select all field names:
Yank them with y, and drop your selections with
,. As with Vim, move your cursor in an empty
location, and paste your selections with
<a-p>.
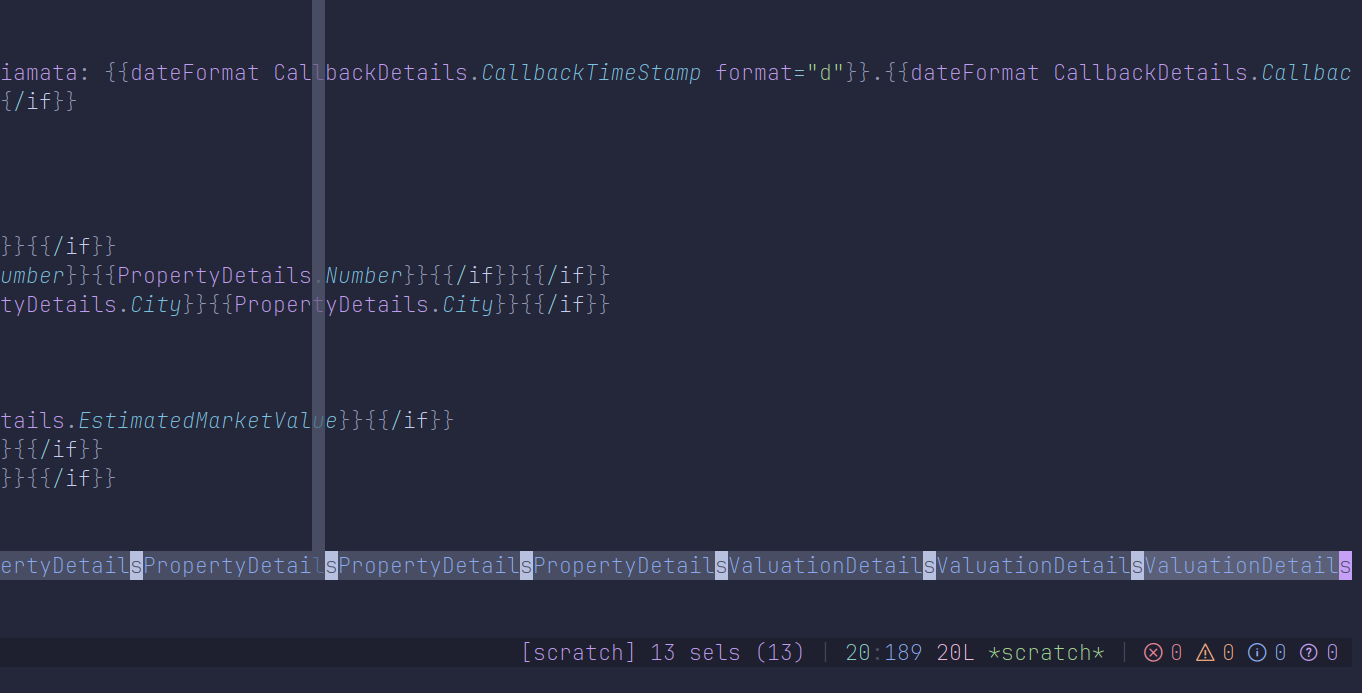
We cannot use
p, becauseppastes with a 1:1 mapping between selections. What it means is thatpis selection-aware, so if you have two selections containingfooandbar, yank them, then move both selections to somewhere else and pressp,foowill be pasted to wherever the first selection is, andbarwill be pasted on the other place. This is incredibly powerful, but here, since we have dropped all selections, pasting withpwill only paste the content of the primary selection.<a-p>will, as the doc says, paste all the selections one after the other, and will put a selection after each of them, which is exactly what we want.
Once pasted, you will notice they are all on the same line.
Simply press i<ret><esc>x to put them ont
different lines and ensure you have a training newline on each of
them:
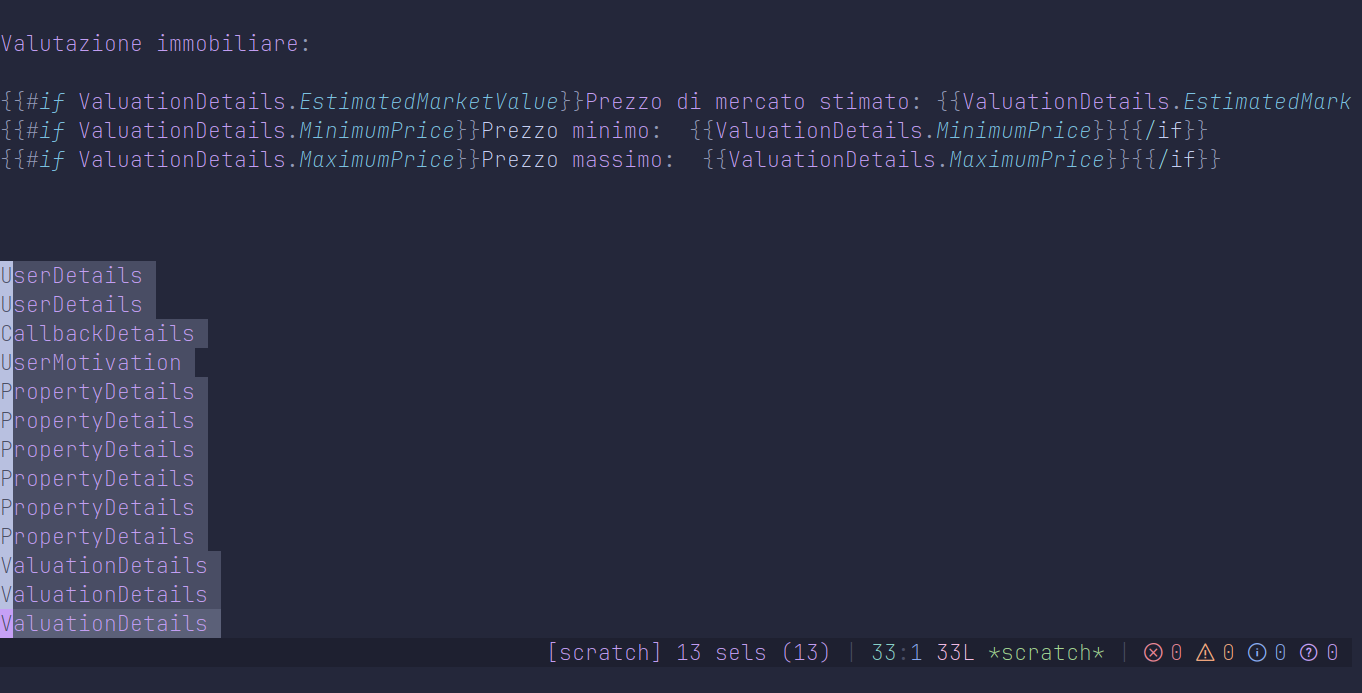
In order to sort them, we need to end up with a single
selection containing them all. We could do this by dropping all
selections with ,, then selecting the whole paragraph
with <a-i>p, but Kakoune has a key for this
exact situation: <a-_>, which merges continuous
selections, across lines:
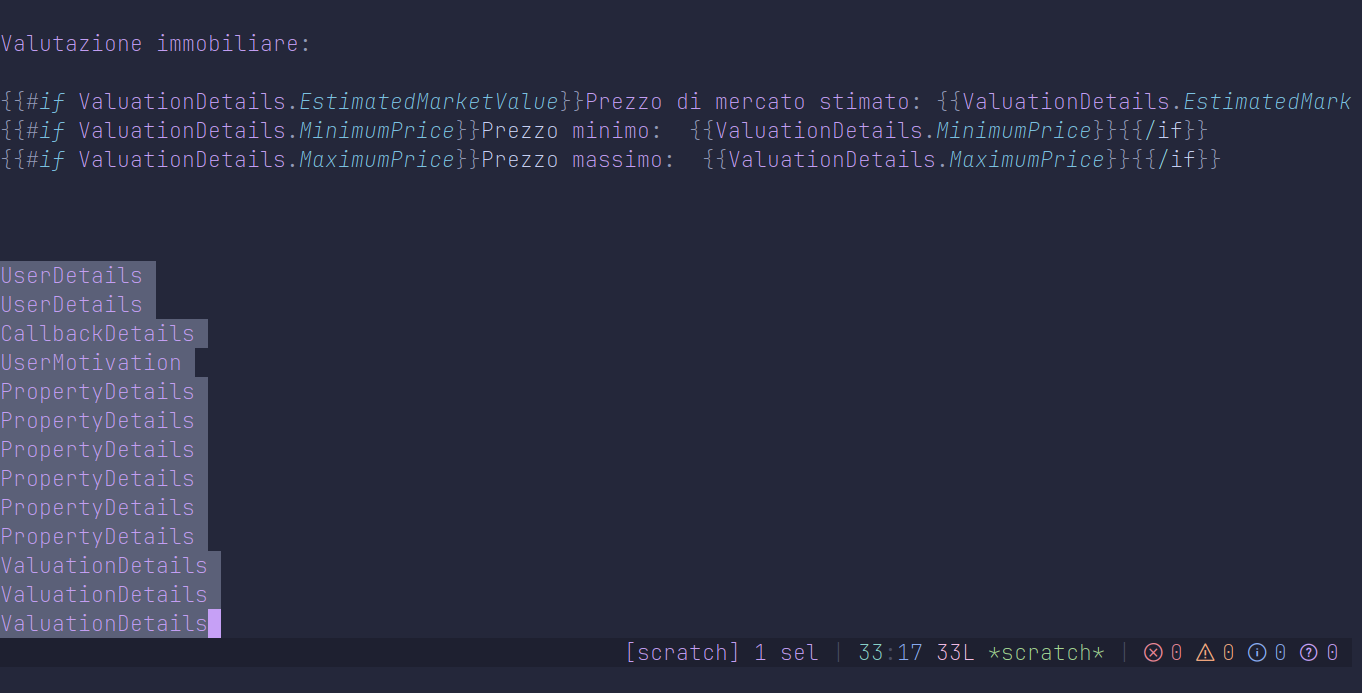
Then simply press |sort -u<ret> to sort them
via the sort program:
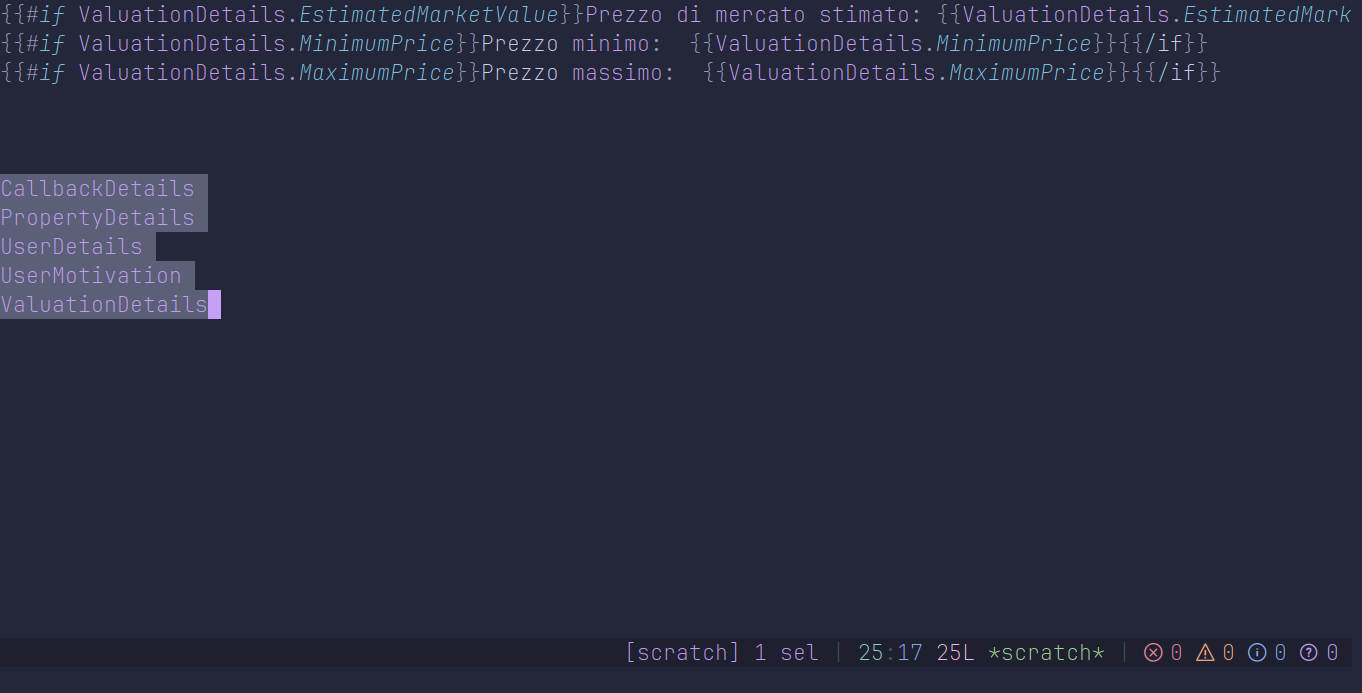
Now, you can get a selection back on each line by pressing
<a-s>, which simply adds a cursor at the end of
each line in the current selections — note the plural; if you had
several disjoint selections all spanning on several lines, it
would apply this logic to all of them, which is really
powerful:
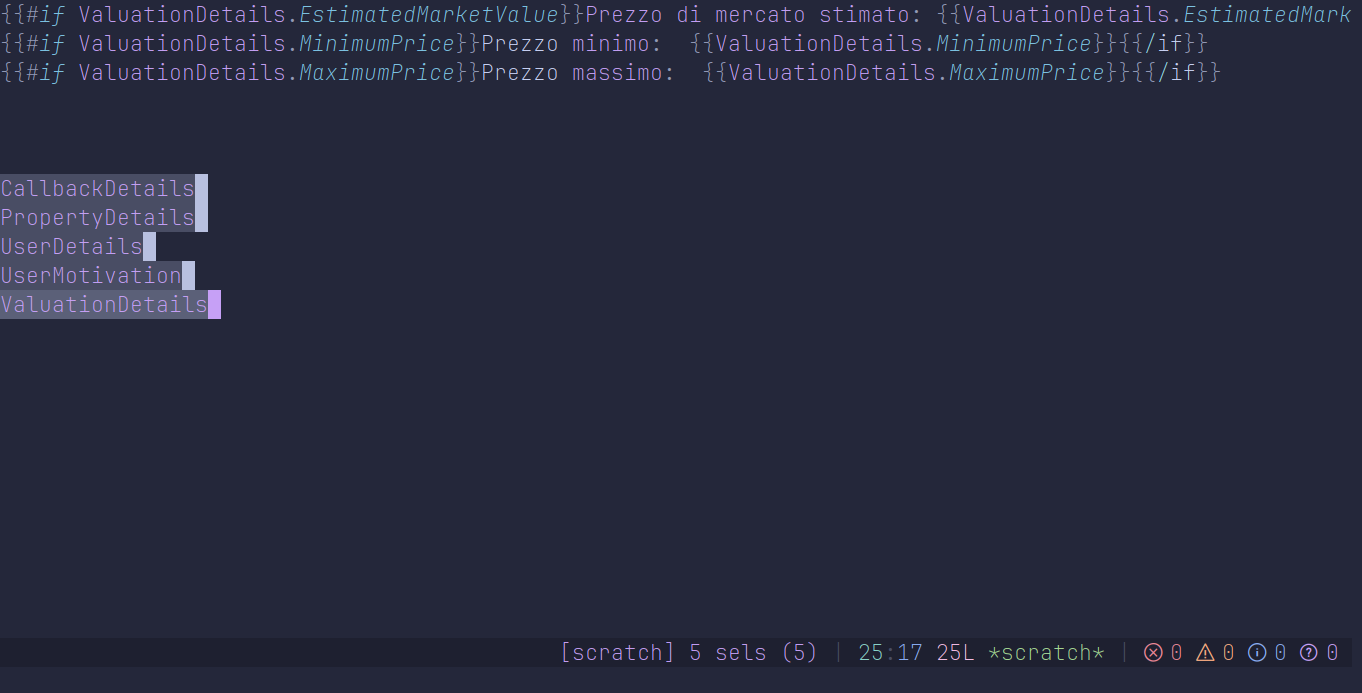
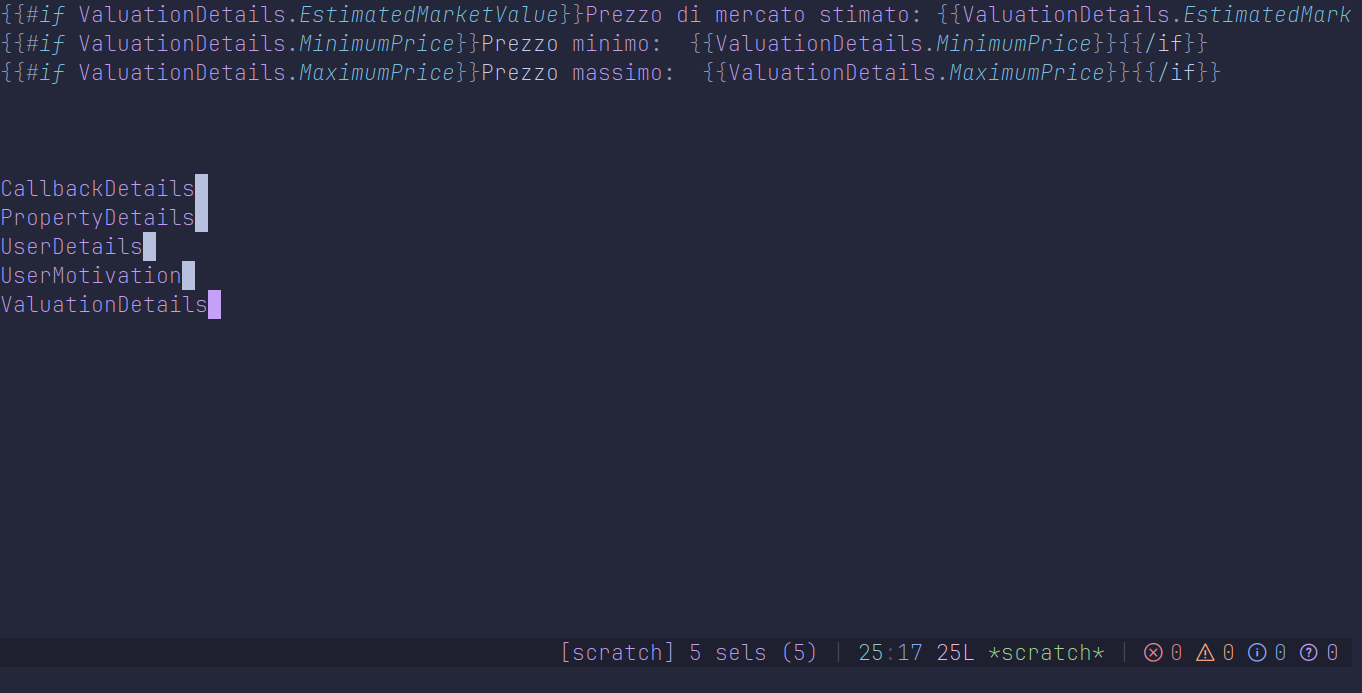
Press ; to reduce all selections to a single
character (anchor = cursor):
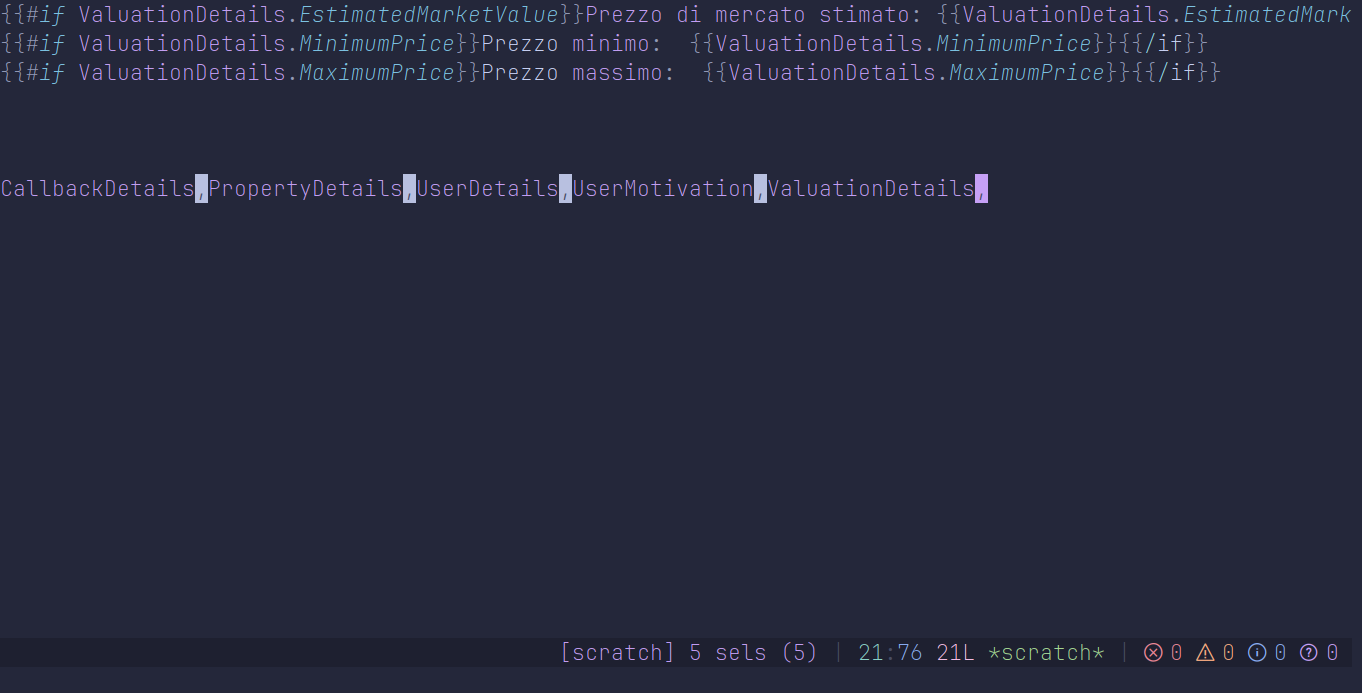
And then simply go with r, to format the whole
thing as a single comma-separated line:
You can drop selections to keep the primary (last one) and use
the same trick as before to remove the trailing ,:
,d.
It might sound like a lot is going on, but it actually is. The great thing is that everything is interactive, and you see what you are doing. Meanwhile, most of that in Vim occurs without you noticing everything, requiring to type a lot of normal commands and crazy substitutions. A single selection mistake will require you to go back from the beginning.
4. Batch process multiple files#
This one is pretty fun too. Given a git status
output, we want to execute a git command on each line.
Note: I would have actually run a single
git update-indexcommand with all the paths as arguments instead, but that defeats the exercise, so let’s stick to just calling the git command for each path instead.
The output is:
On branch main
Your branch is up to date with 'origin/main'.

Changes not staged for commit:
  (use "git add <file>..." to update what will be committed)
  (use "git restore <file>..." to discard changes in working directory)
   modified:   ExcelGenerator/App.Debug.config
   modified:   ExcelGenerator/App.config
   modified:   Core/ConfigBase.cs
   modified:   Infrastructure/Security/Password.cs
   modified:   Tools.AgentExport/App.Debug.config
   modified:   Tools.AgentExport/App.config
   modified:   Tools.CheckLeadsForConfirmedEmail/App.Debug.config
   modified:   Tools.CheckLeadsForConfirmedEmail/App.config
   modified:   Tools.EmailSender/App.Debug.config
   modified:   Tools.EmailSender/App.config
   modified:   Tools.LeadChecker/App.Debug.config
   modified:   Tools.LeadChecker/App.config
   modified:   Tools.LeadImport/App.Debug.config
   modified:   Tools.LeadImport/App.config
   modified:   Tools.LeadManager/App.Debug.config
   modified:   Tools.LeadManager/App.config
   modified:   Tools.LeadReminder/App.Debug.config
   modified:   Tools.LeadReminder/App.config
   modified:   Tools.SmsSender/App.Debug.config
   modified:   Tools.SmsSender/App.config
   modified:   Web.Backend/Web.Backend.csproj
   modified:   Web.Backend/Web.Debug.config
   modified:   Web.Backend/Web.config
In Vim, we need to run a bunch of commands: bring the output of
git status in the buffer, remove lines not containing
a modified path, map all lines to git commands, and
execute all lines as bash commands.
Let’s see how I would do that in Kakoune.
First, as a disclaimer, I need to mention that Kakoune has a
support for git via its standard distribution and the
:git command. It would be cheating, so I will not use
it.
From an empty buffer, let’s bring in the output of
git status by simply typing !git status
— let’s change the output to match whatever the exercise has:
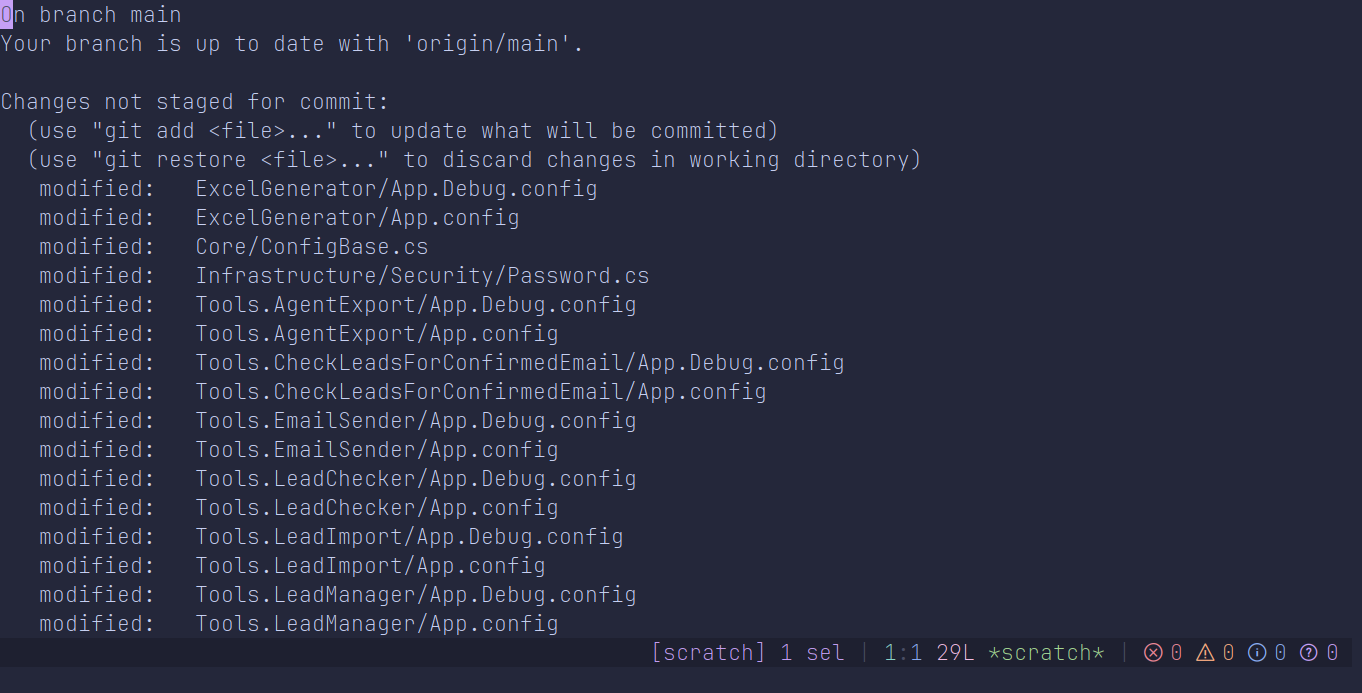
Then, it’s pretty simple: %smod<ret>wwlGl to
select all paths:
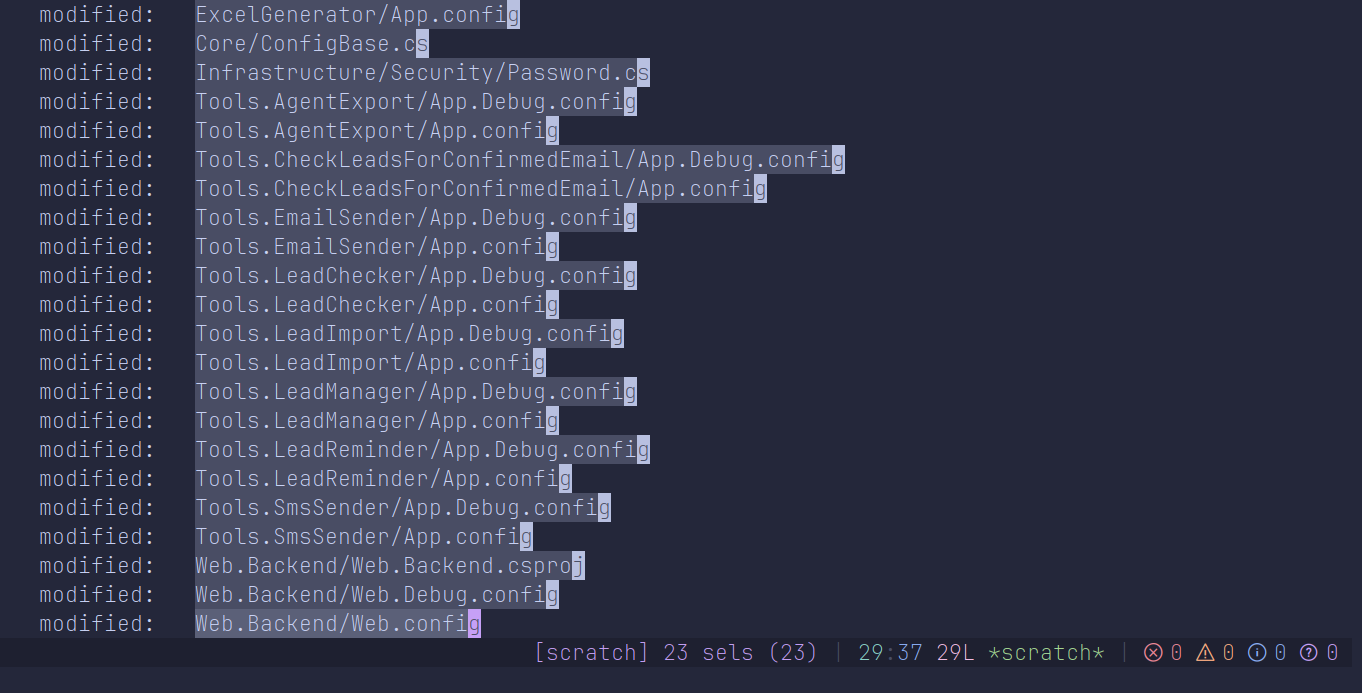
And it’s almost done. Press <a-|> to pipe
each selection as standard input of the program of your choice,
and use
xargs git update-index --skip-worktree <ret>.
This will run that program with each selection as argument.
5. Integrate data from external sources into your project#
Another crazy one from Vim: from a text dump of some random data (IP, masks, subnets), we want to create some C# code that will whitelist those IP addresses. The goal is to format around the data, and it’s really bad for Vim, because its regex thing is absolutely disgusting, while Kakoune was designed specifically with that kind of usecase in mind.
Just so you see it, the Vim way requires to format the data, extract texts in many registers, map the data to actual code, and other things, which results in those lines:
`[v`]:'<,'>s/^.\(\d*\).\{-}\(255.*\)\t.*/'\1': '\2',/ | '<,'>j | s/.*/{ & }/
/new Re<Enter>"ayf";;"byf";;"cy$
`[v`]:'<,'>g/^$/d
gv:'<,'>s/\(.*\)\/\(.*\)$/\='<C-r>a' . submatch(1) . '<C-r>b' . <C-r>m[submatch(2)] .  '<C-r>c'
Now let’s see how to do that in Kakoune. We start with the same buffer as Vim:
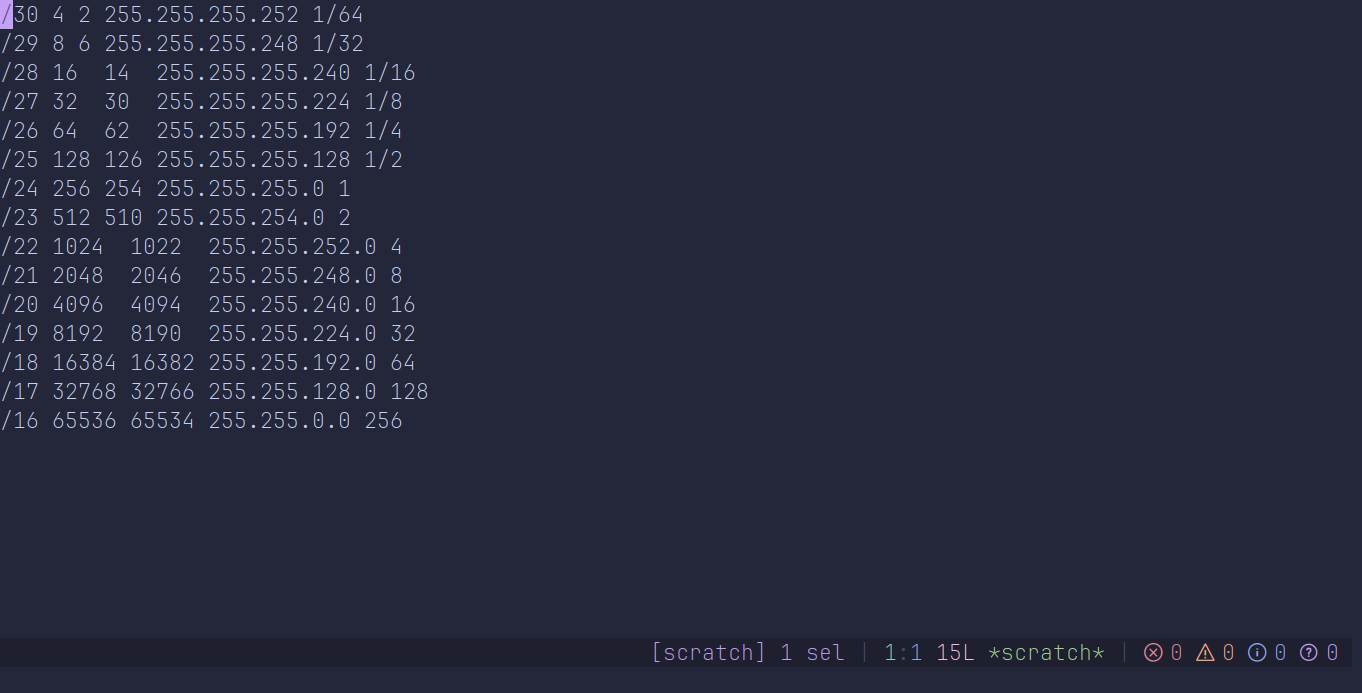
I think the best approach here is to use a macro — yes! Kakoune has them! — and a wonderful feature of Kakoune regarding selections: executing arbitrary keys on each of the selection. First, let’s paste one IP address:
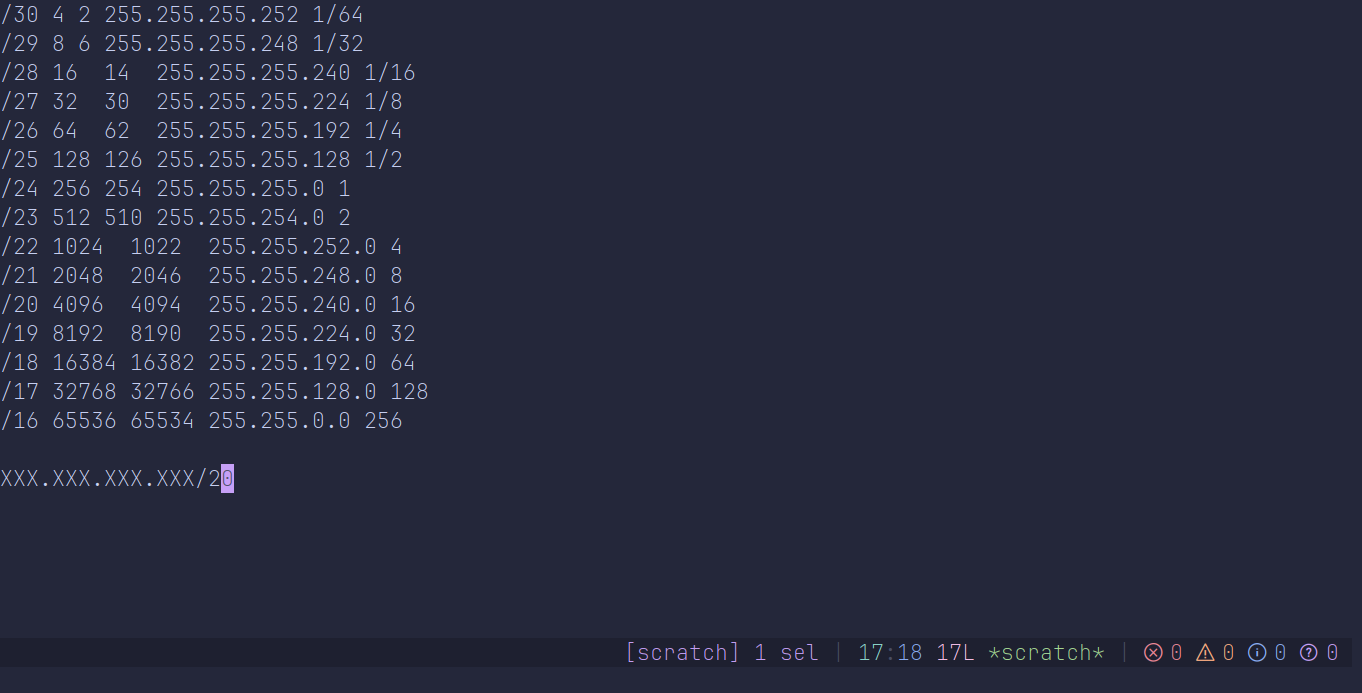
We can start the macro by pressing the Q key — the
macro will be registered to the @ register by
default. Start by moving at the end of the current line with
gl:
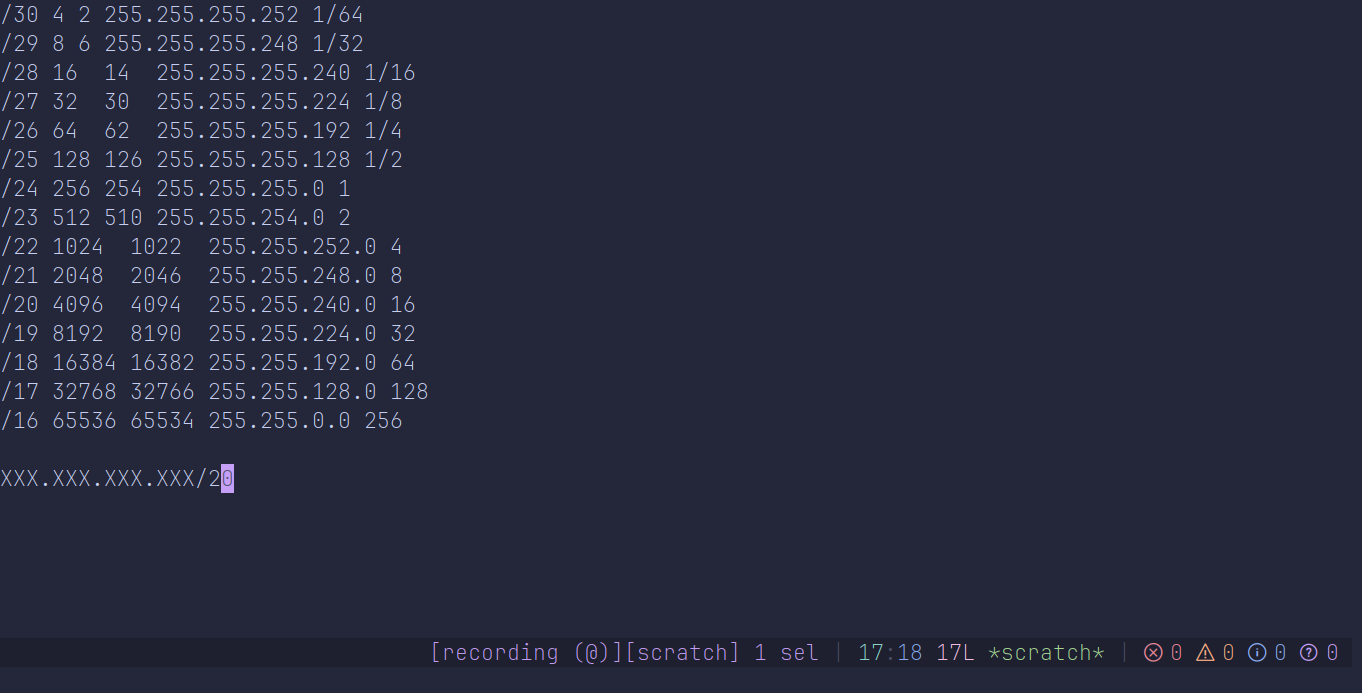
Then, we are going to do a reverse character search, yank the
subnet mask index, and put a mark to save the current
selection with <a-t>/yZ:
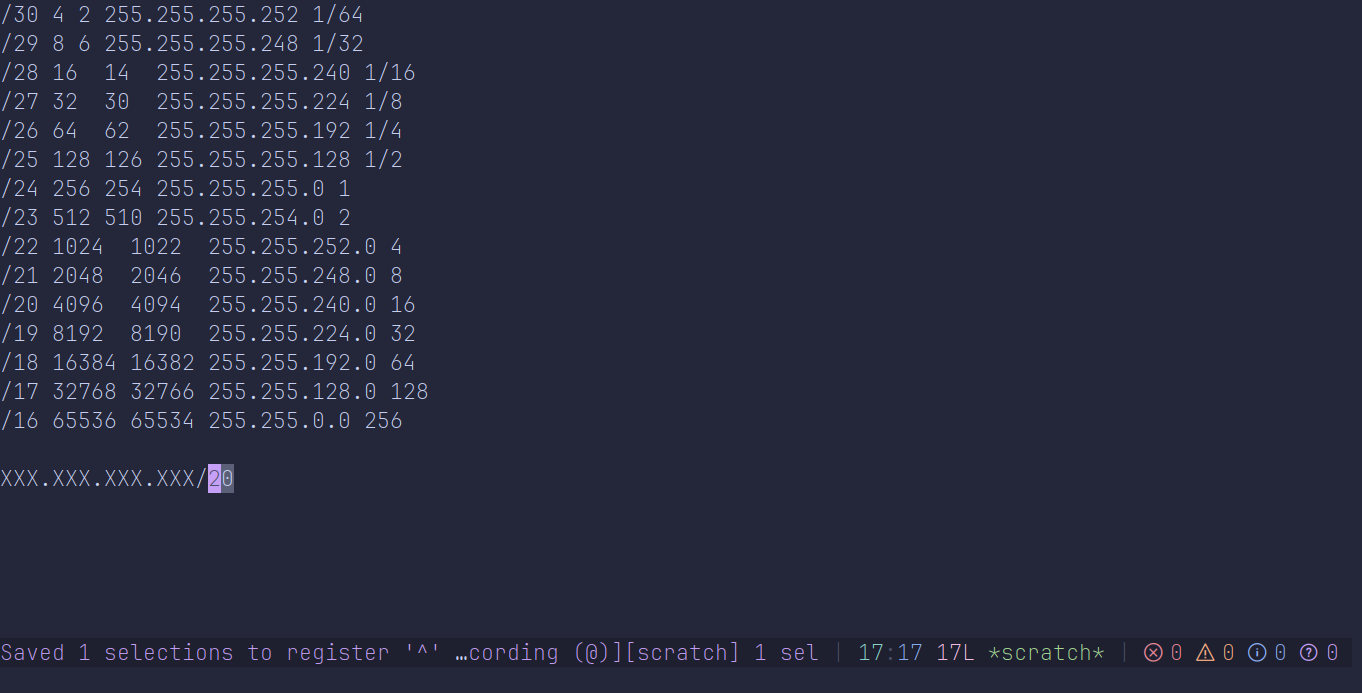
Zhere is a feature that is not available on Helix; you can probably use the jump list’s<c-s>feature in Helix there, but I haven’t tried.
Now, the default " register has the mask index. We
can just do a regular search of /N with
N the mask index with the
//<c-r>"\t<ret> keys:
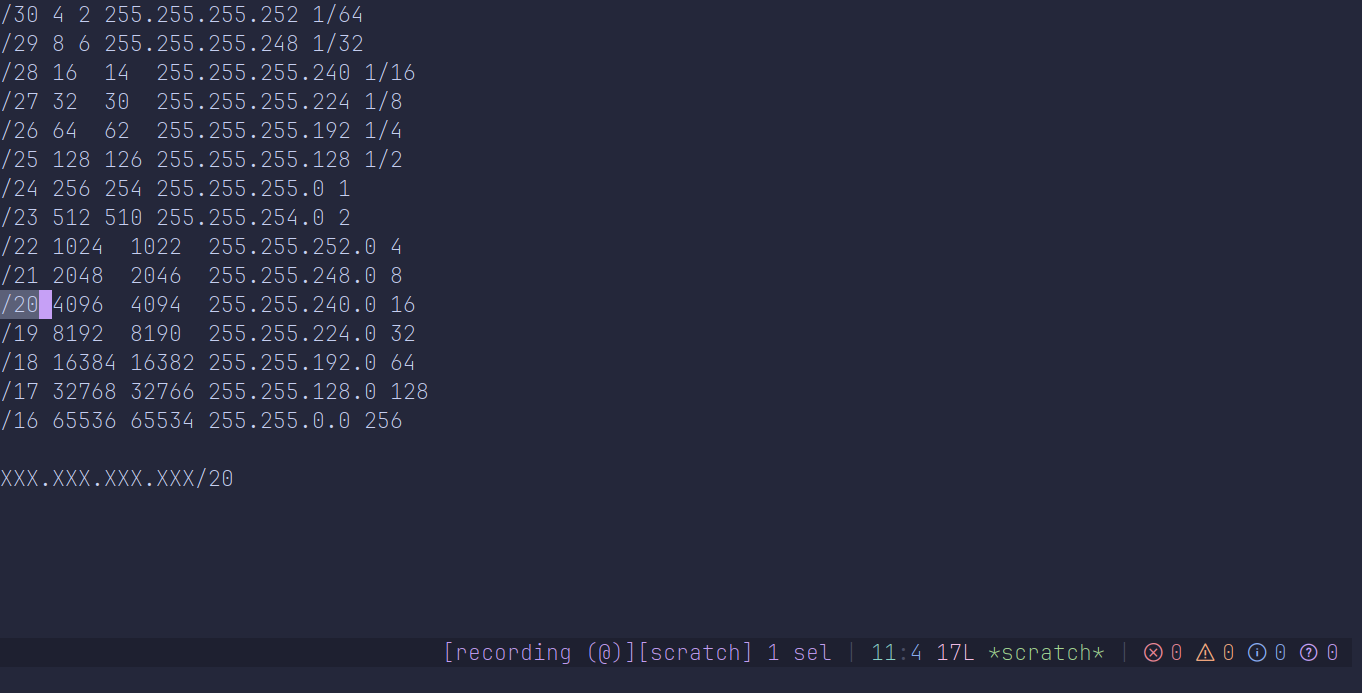
We can move the cursor to the right to select the actual mask
value with wwl?\tH:
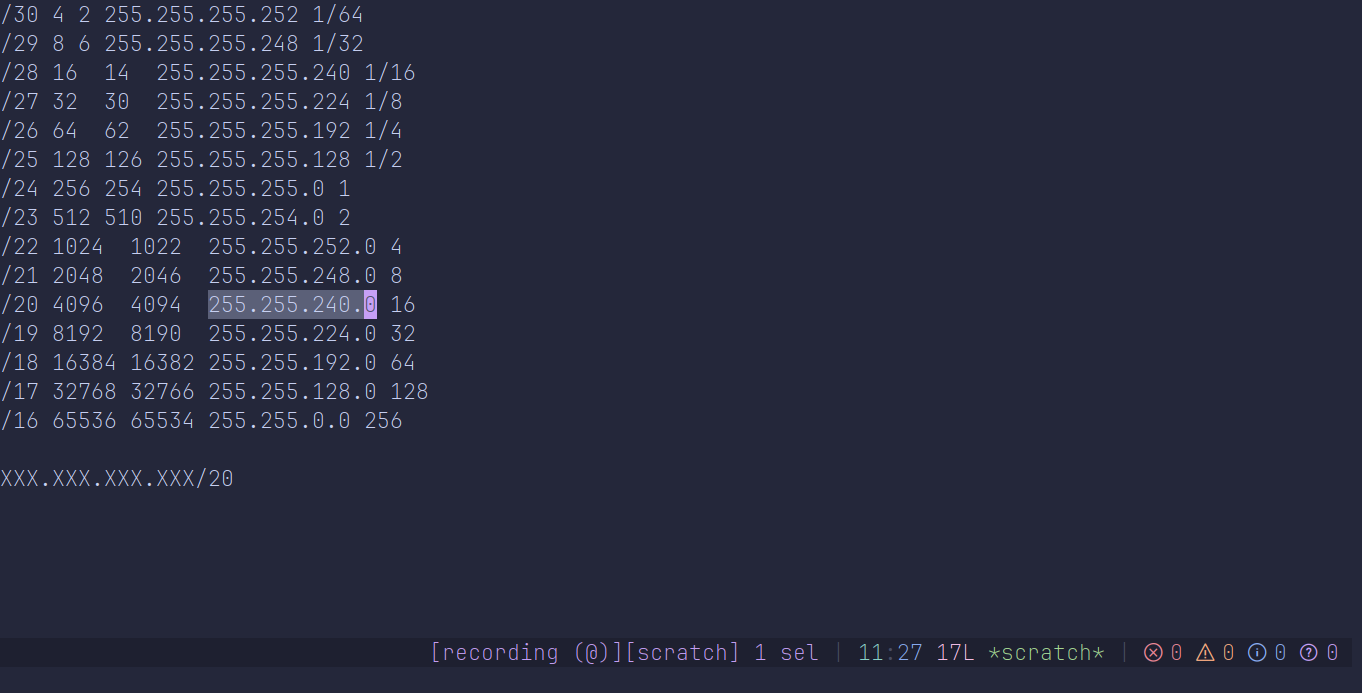
?is the extend version of/. We need to use this because the values are separated by\t. If it was a regular space, we could have usedtinstead.
Now, let’s yank that value in the m register to be
sure we won’t lose it with "my:
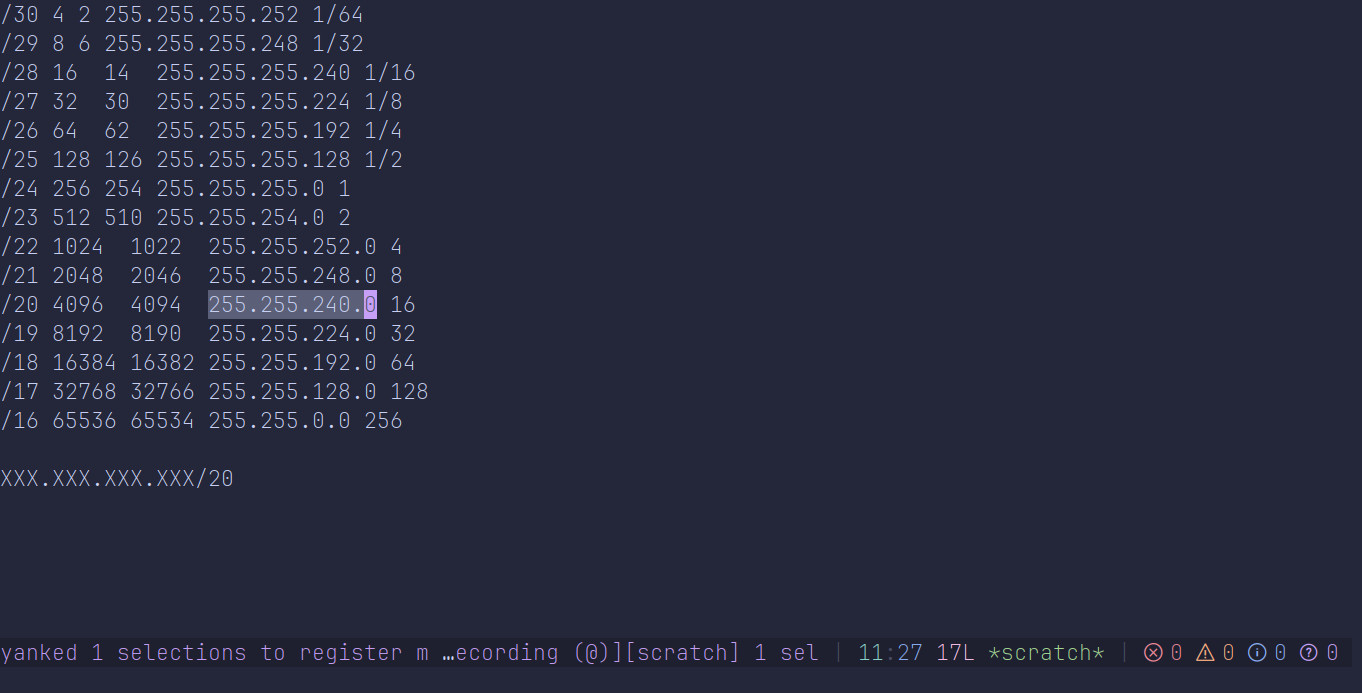
Press z. It will restore your selection back to
the subnet index in the IP address:
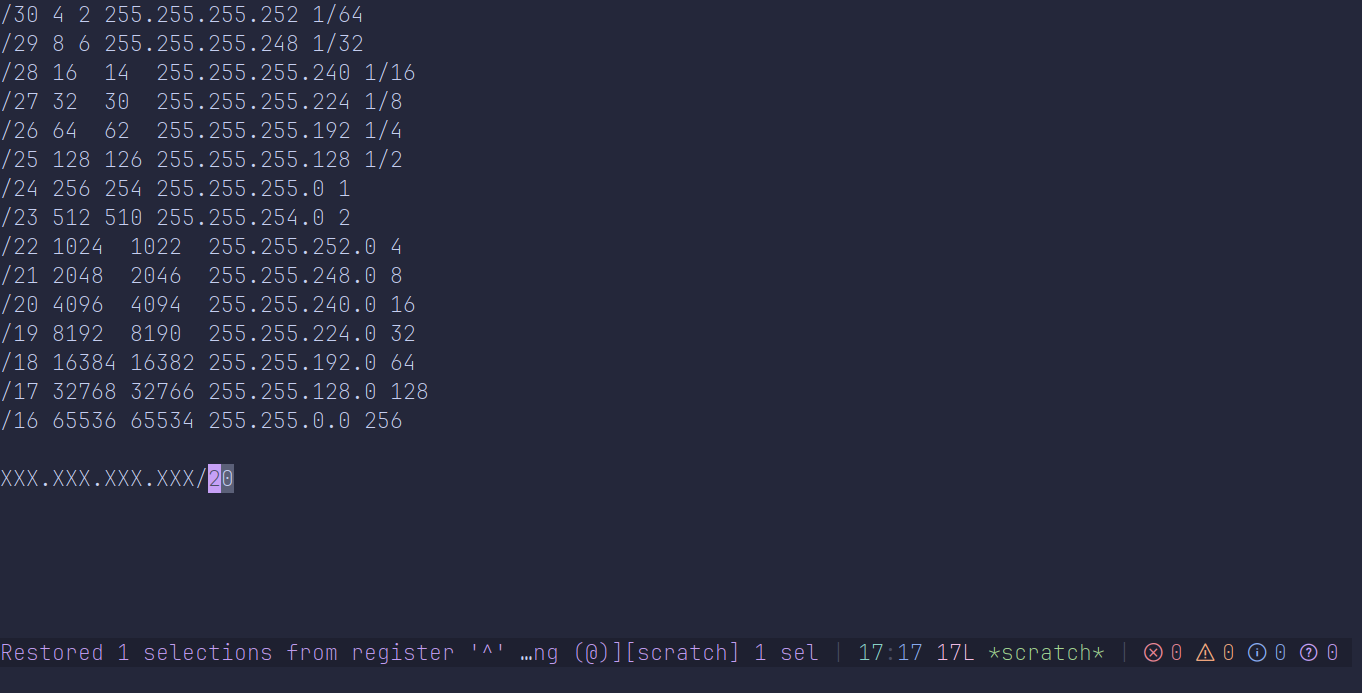
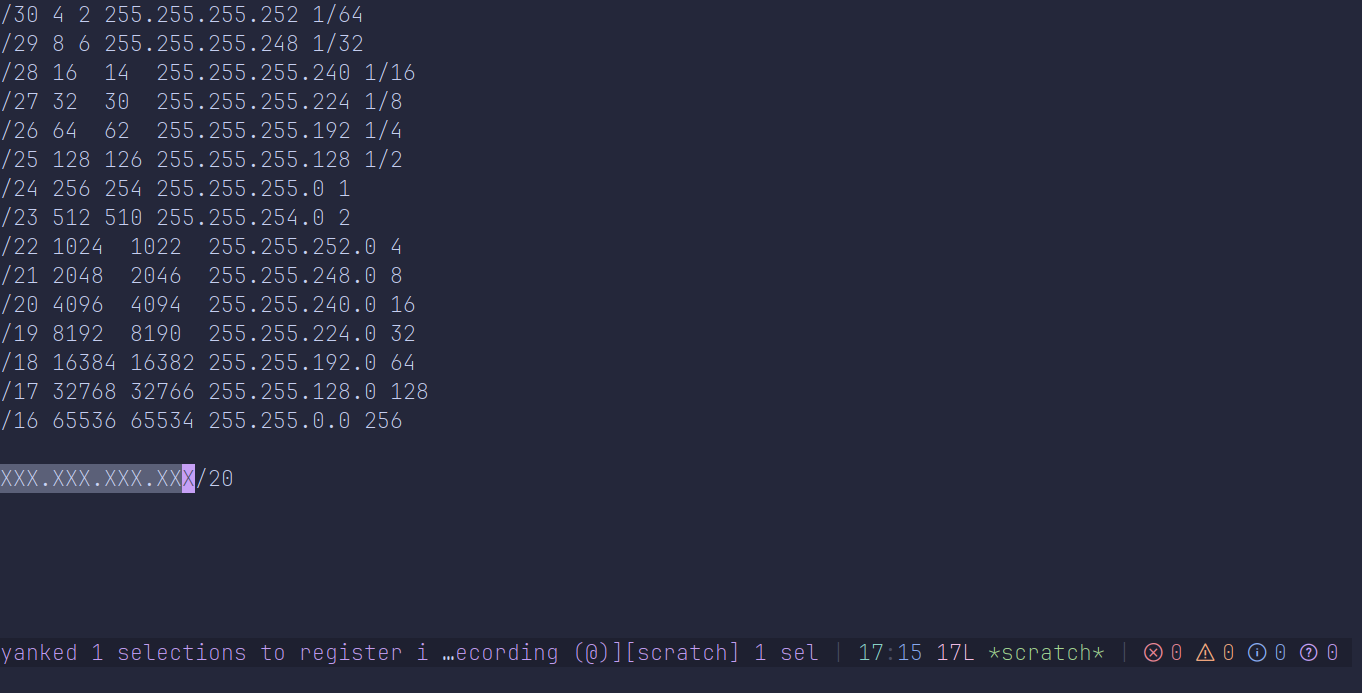
From this place, we can start formatting the line. Let’s copy
the IP address into the i register, and remove the
rest. Go to the beginning of the line with gi, select
up to the / with t/, and
"iy to yank the IP address into the i
register:
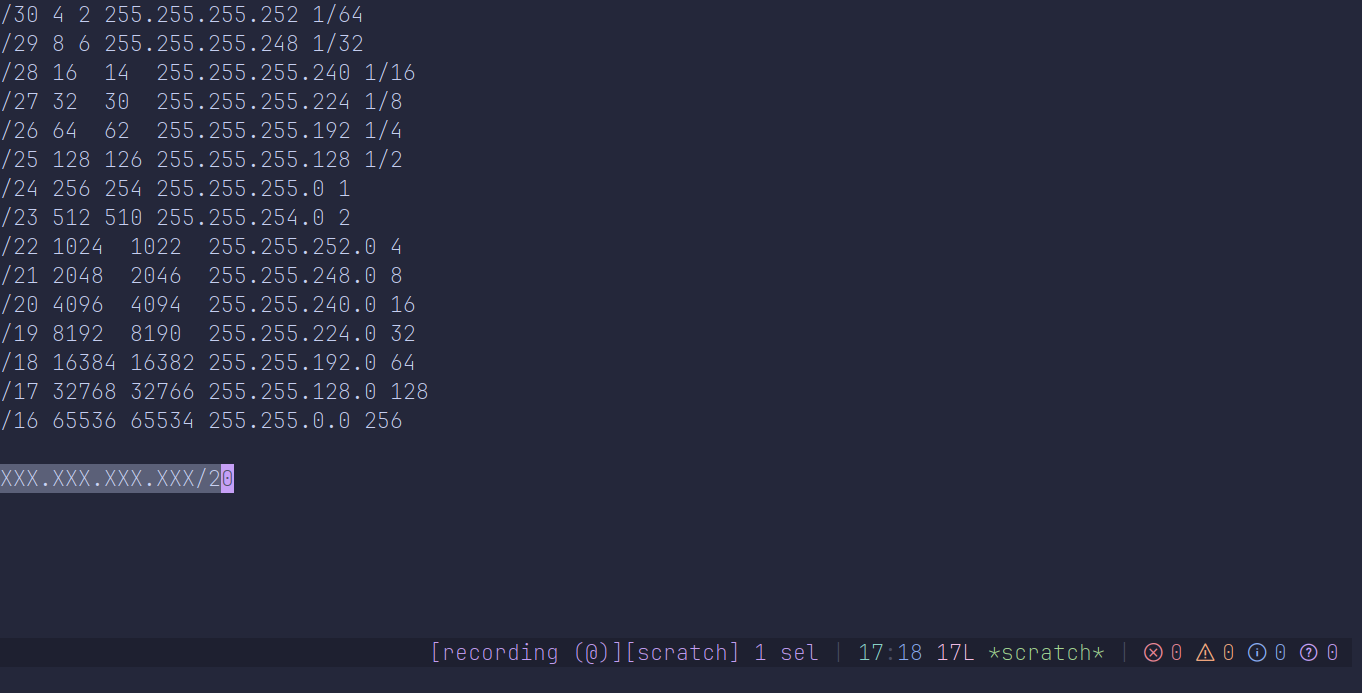
Replace the whole line with x_:
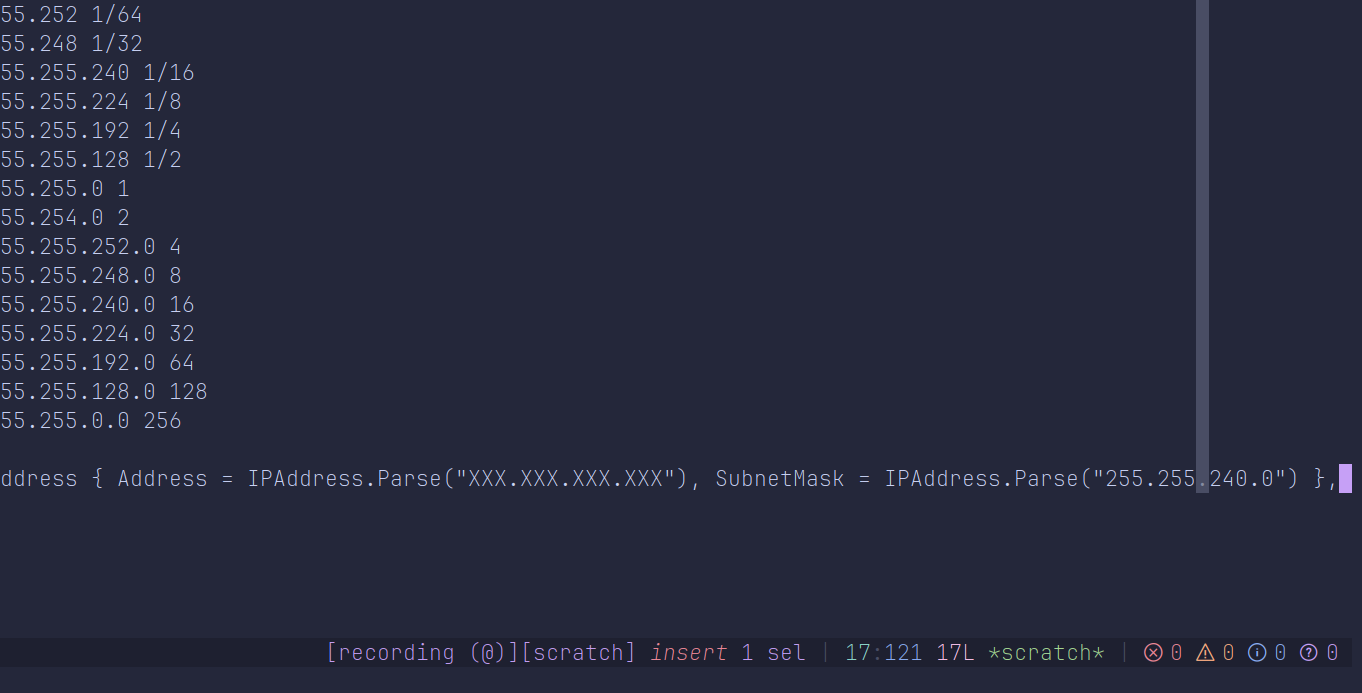
Press r and start writing your code. Whenever you
need to put the IP address, use <c-r>i. To put
the mask, use <c-r>m:
And now that this is done, finish recording with
Q. Now, for every more lines we have an IP address
on, just press q to replace it with the code:
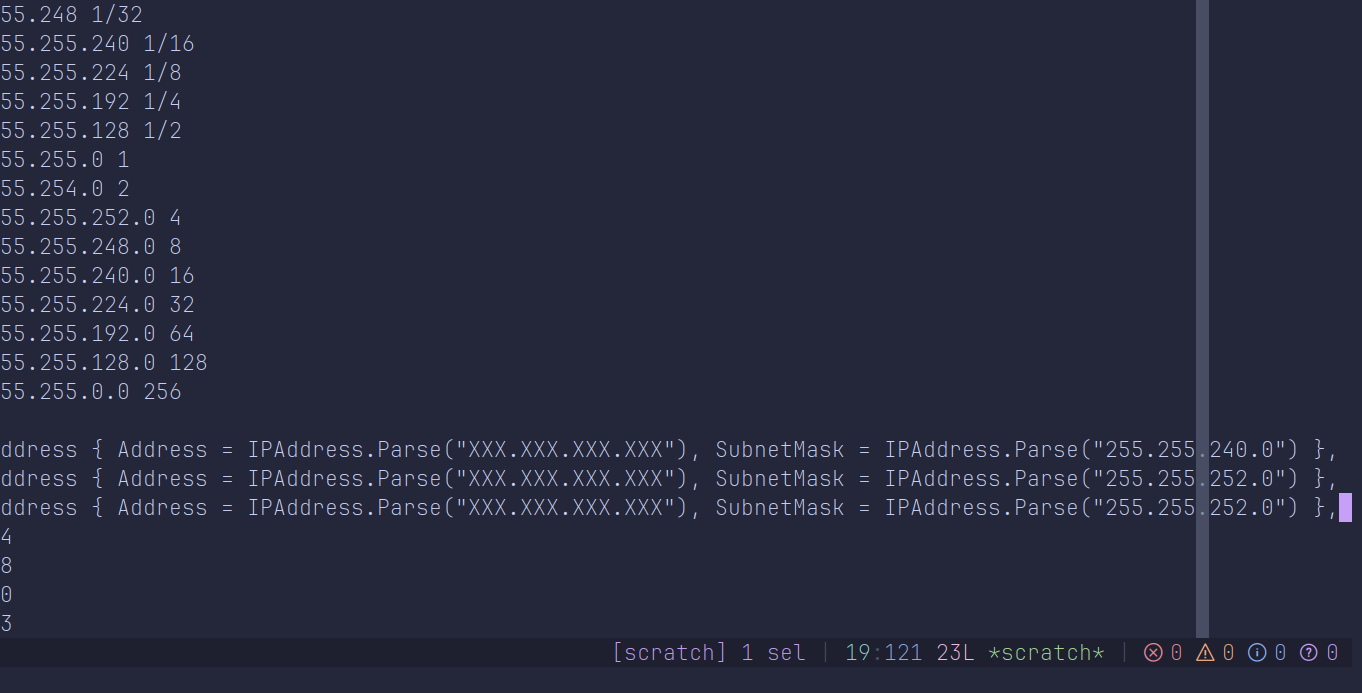
However, there is a better feature of Kakoune we can use here.
execute-keys#
execute-keys — which we often use abbreviated
exec — allows to type keys as if they were typed by
the user in a more controlled way. For instance, this command
accepts the -itersel flag, which runs the command for
every selection. Along with the -with-maps (required
for macros, I think?), we can select all IP addresses, spawn a
selection on each of them with <a-s> as seen
previously:
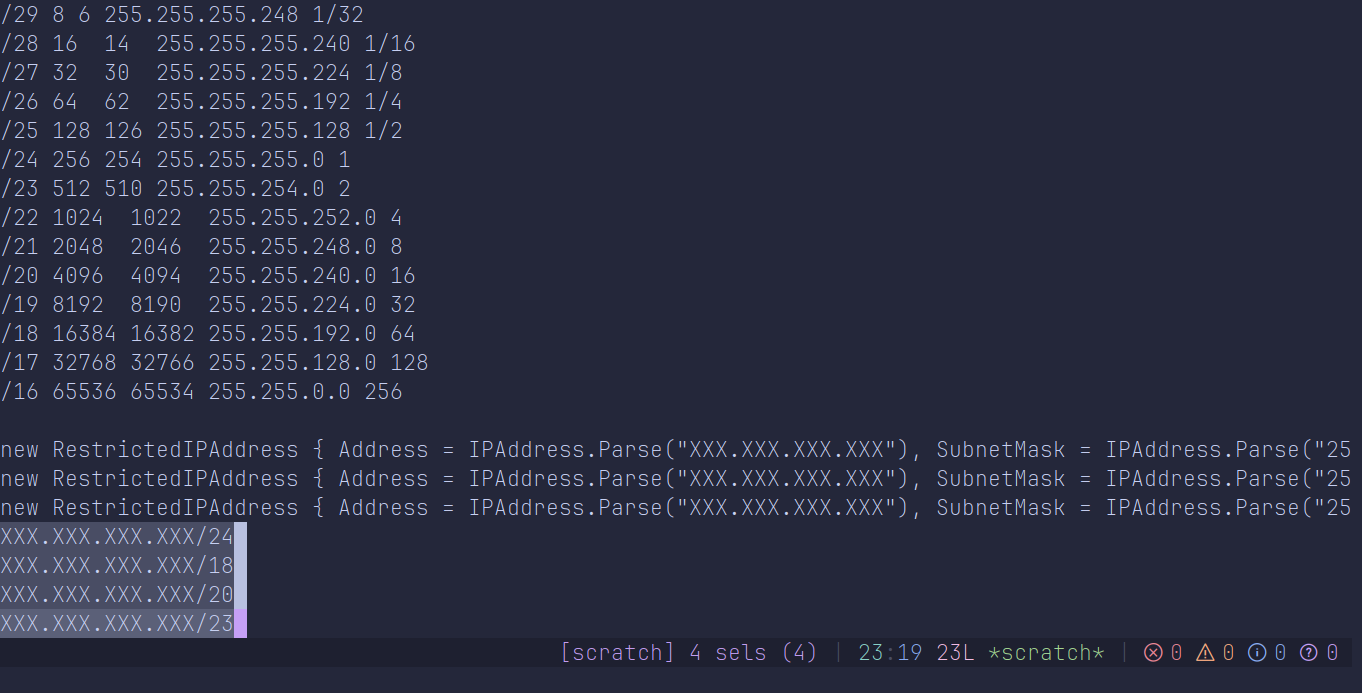
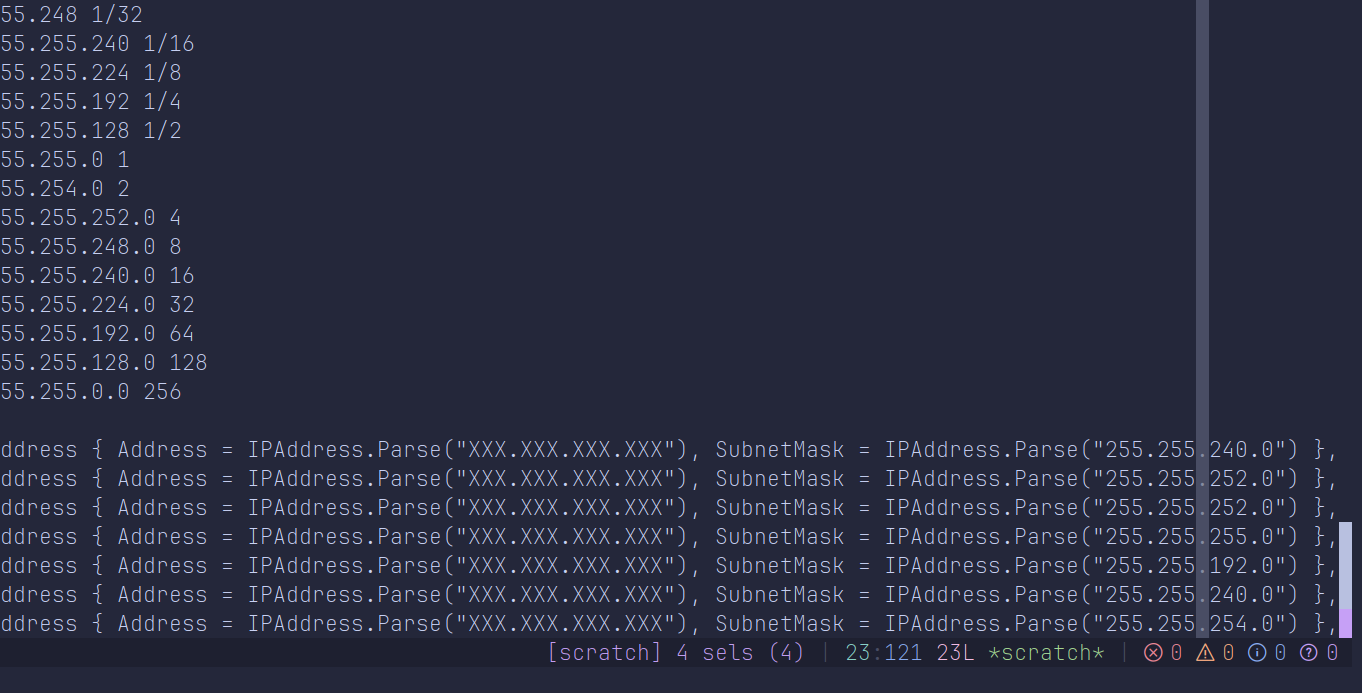
And then press :exec -itersel -with-maps q:
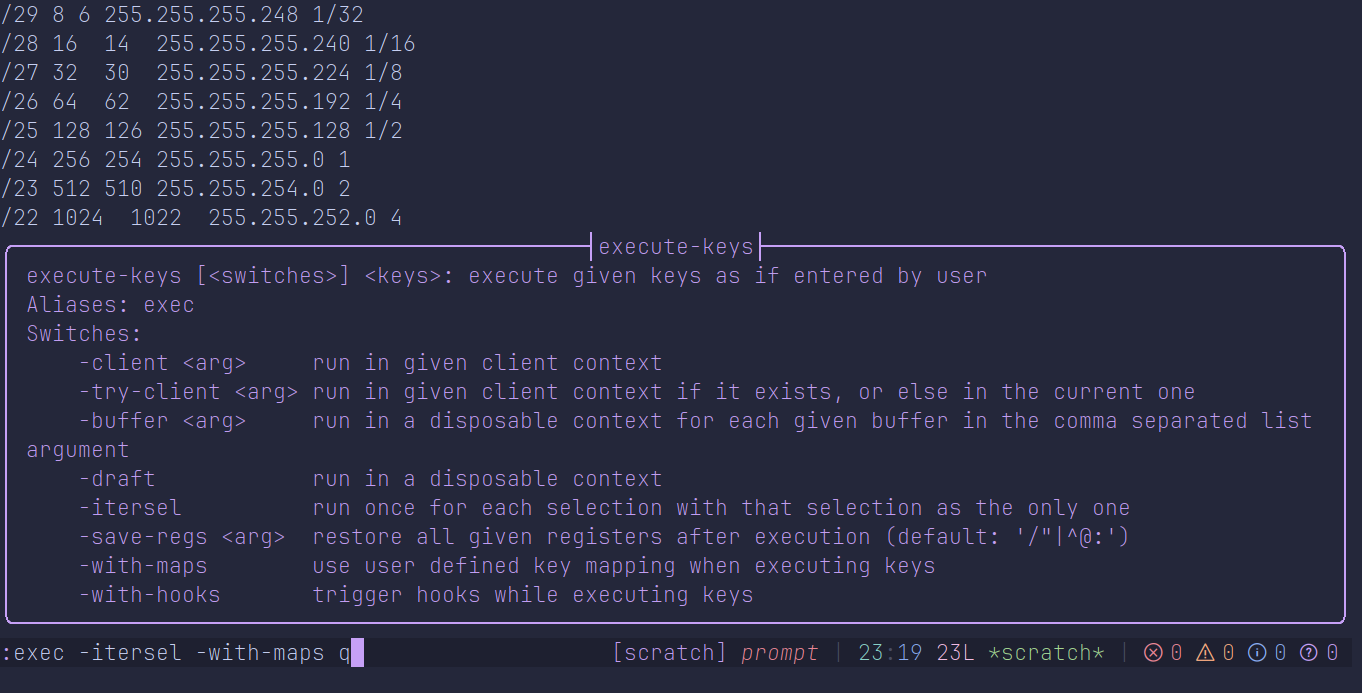
Press <ret>. Taaadaaa:
Kakoune has an incredible design#
The design of Kakoune shines here. You can see that you can do
everything by incrementally and visually progress through your
mental model, instead of having to think of everything in advance.
The fact that you can use regular commands such as w,
y, d, f etc. on many
selections at once creates such a friendly environment to
implement very complex workflows, without needing to use the crazy
regex and substitute commands from Vim.
I hope that blog article provided a good hindsight on how we can do things in Kakoune vs. Vim, and why many people — me included — prefer the modal editing model of Kakoune.
Keep the vibes!